Skip to main content
Menu
Virtual Consult
713-800-6060
Home
James F. Boynton, MD, FACS
Meet James F. Boynton, MD, FACS
Choosing a Board-Certified Plastic Surgeon
Online Patient Reviews
Patient Reviews
Photo Gallery
Video Gallery
Facial Procedures
Facial Procedures Overview
Eyelid Surgery (Blepharoplasty)
Facelift
Facelift Cost
Neck Liposuction
Brow Lift
Neck Lift Surgery and Minimally-Invasive Neck Rejuvenation Options
Ear Surgery (Otoplasty)
Earlobe Lift and Repair
Chin Augmentation
Lip Lift
Fat Transfer With Microfat and Nanofat
Skin Rejuvenation & Nanofat for Hair Restoration
Buccal Fat Removal
Breast Procedures
Breast Procedures Overview
Breast Augmentation
Breast Lift
Breast Augmentation With Lift
Breast Reduction
Revisional Breast Surgery
Breast Implant Removal
Breast Implants
Inverted Nipple Correction
Mommy Makeover
Body Procedures
Body Procedures Overview
Tummy Tuck (Abdominoplasty)
Mommy Makeover
Liposuction / Lipocontouring
In-Office Power-Assisted Liposuction (PAL)
Plastic Surgery After Weight Loss
Labiaplasty
Arm Lift (Brachioplasty)
Thigh Lift
Mommy Makeover
Gynecomastia Surgery
Options for Men
Options for Men Overview
Male Liposuction
Gynecomastia Surgery
Non-Surgical
Non-Surgical Overview
Our Cosmetic Enhancement Providers
Meet Dr. James Boynton
Meet Our Team
Cosmetic Injectables
Neurotoxin Injections
Revance
®
RHA
®
Collection of Dermal Fillers
Belotero Balance
®
Restylane
®
Radiesse
®
Hand Rejuvenation
Laser & Light Treatments
Clear + Brilliant™ Laser Skin Renewal
Body Enhancement
Skin Care & Beauty Treatments
Cellutone
®
for Cellulite & Skin Texture Improvement
SkinPen
®
Microneedling
CryoCorrect – Dark Spot Correction
LATISSE
®
Dermaplaning
Chemical Peels
Skin Care Products
CO2LIFT
®
Patient Information
Patient Information Overview
Meet Our Staff
Our Office
Practice Location
Virtual Consultation
3D Patient Education Videos
TouchMD
Payments & Financing
Travel Arrangements
Local Area Attractions
Boynton’s Blog
News Room
San Antonio Location
Virtual Consultation
Contact
Contact Us
Virtual Consultation
Directions
Schedule Your Consultation
Boynton Plastic Surgery
Gallery
Home
/
Return to Main Photo Gallery
/
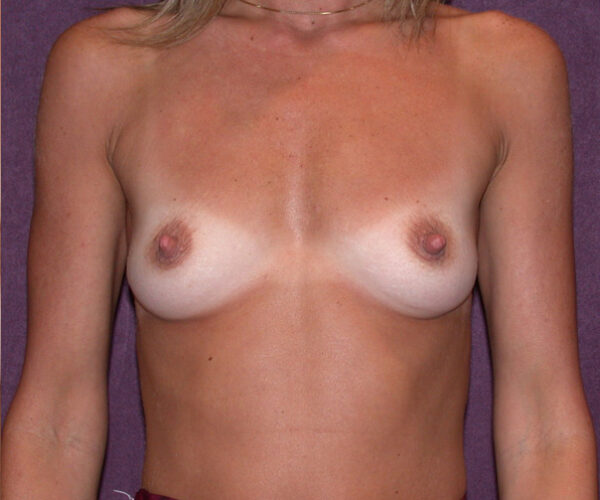
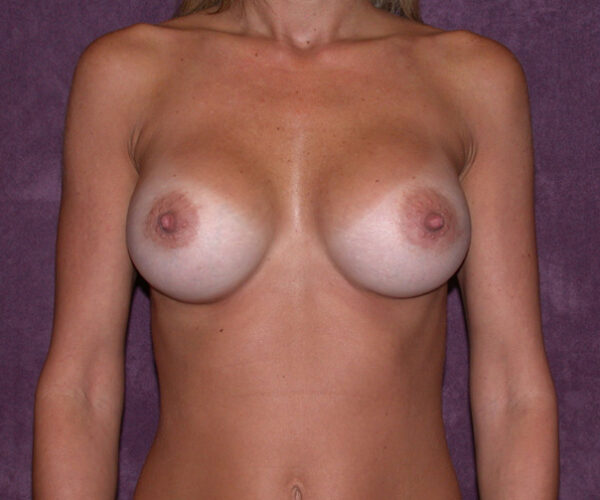
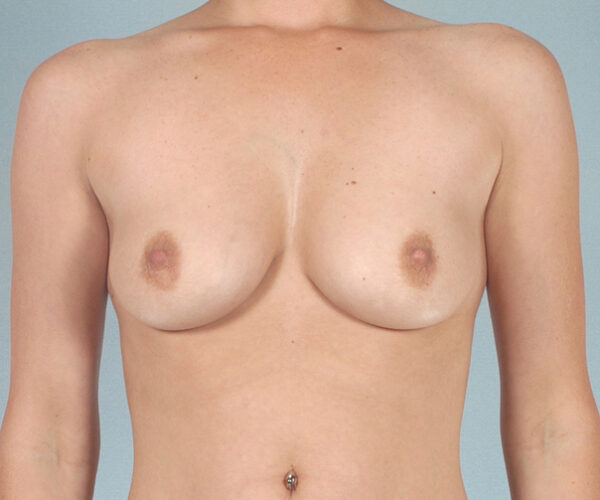
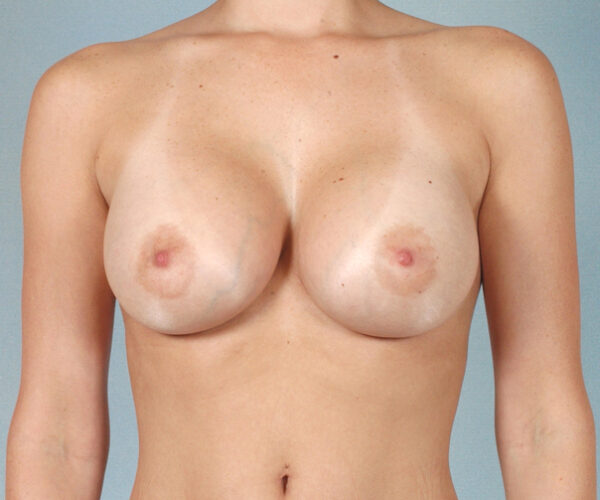
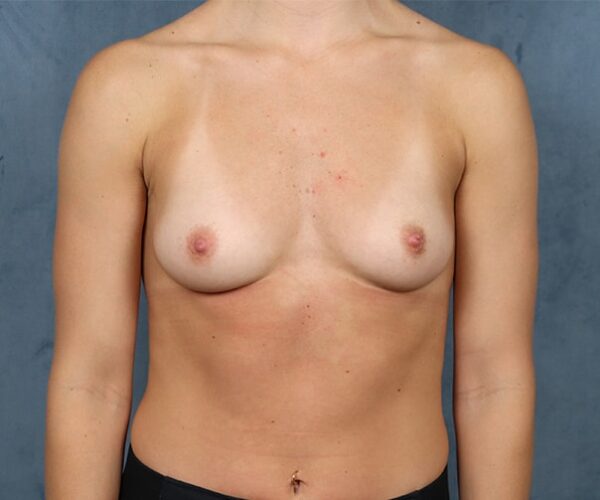
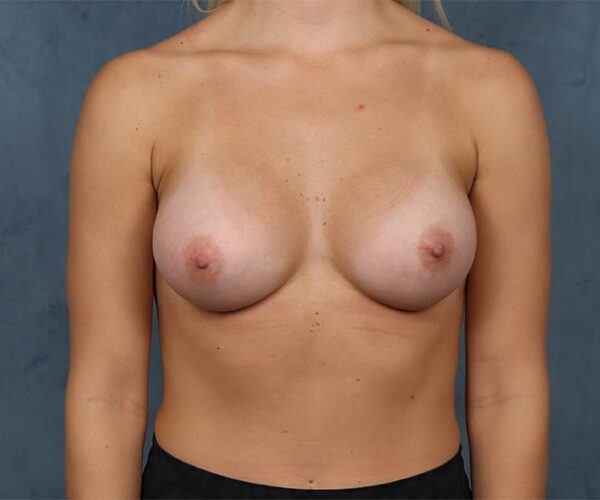
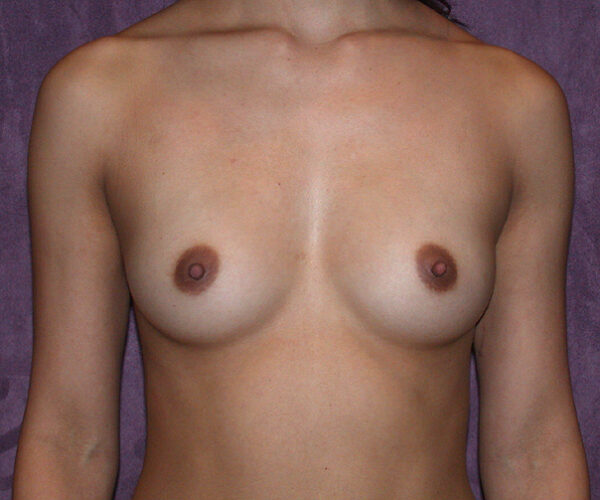
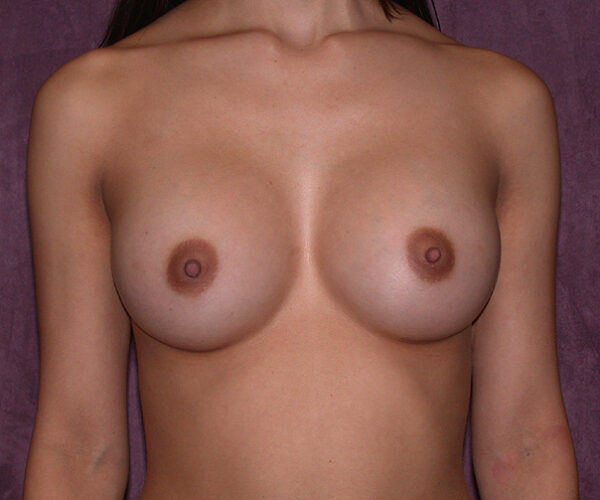
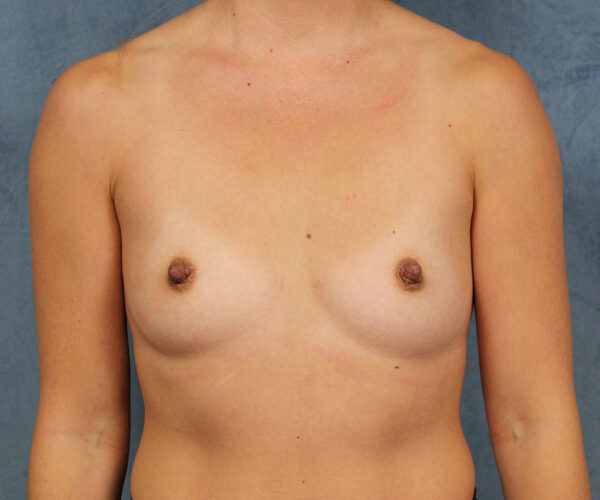
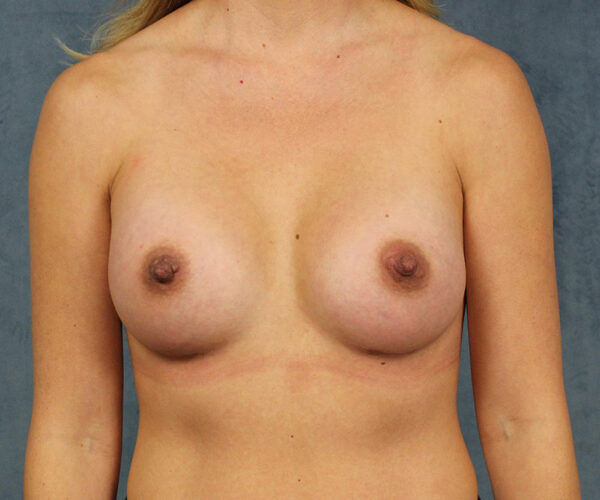
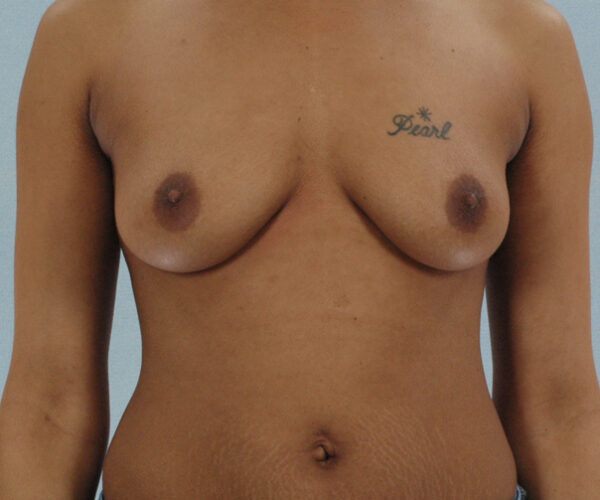
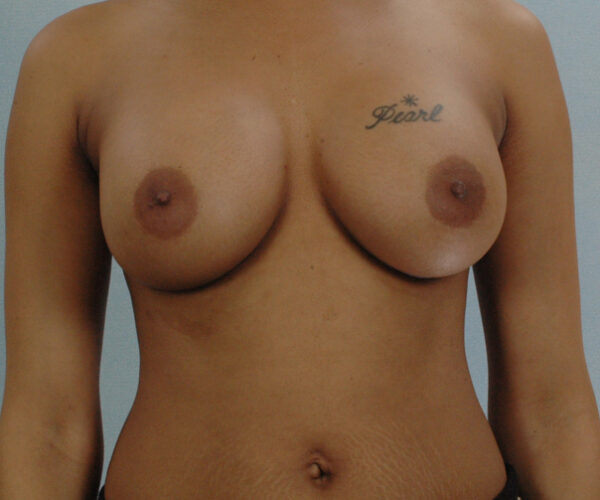
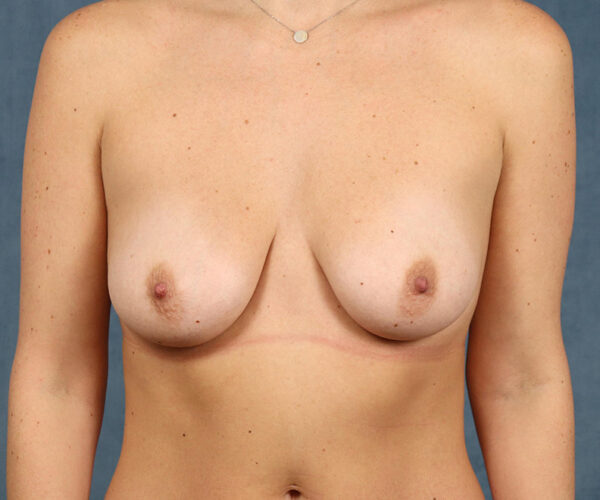
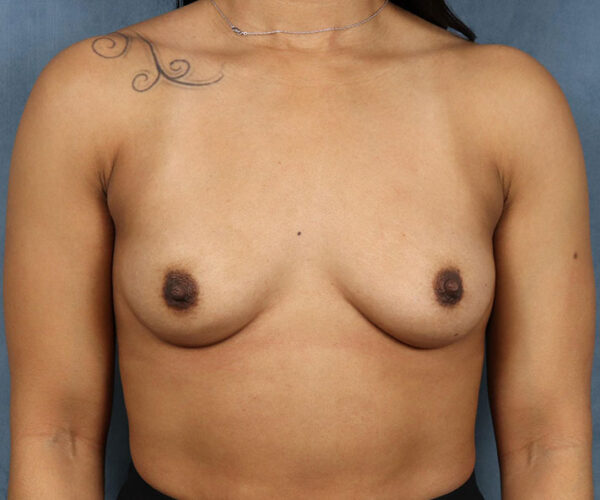
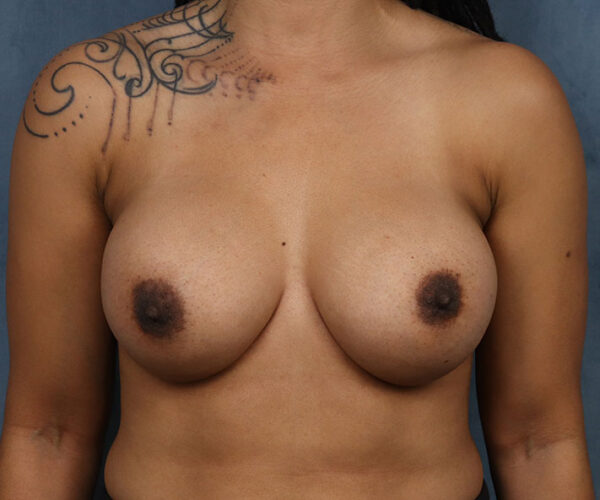
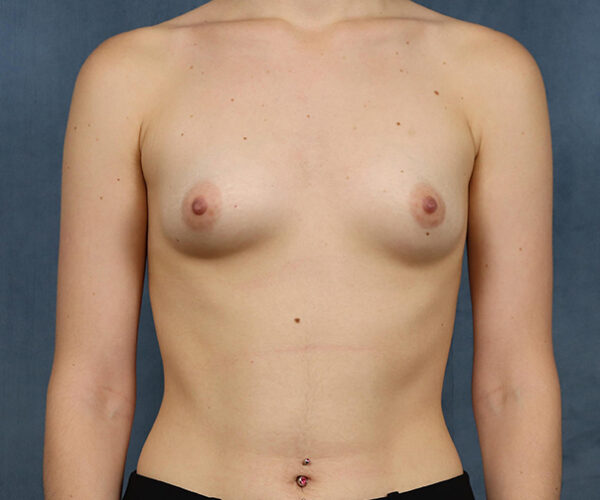
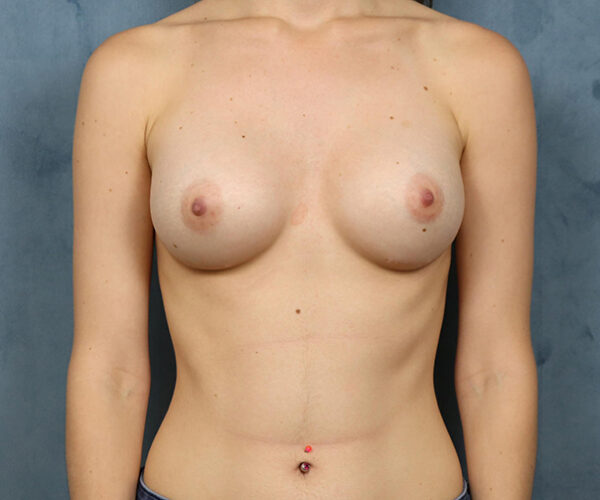
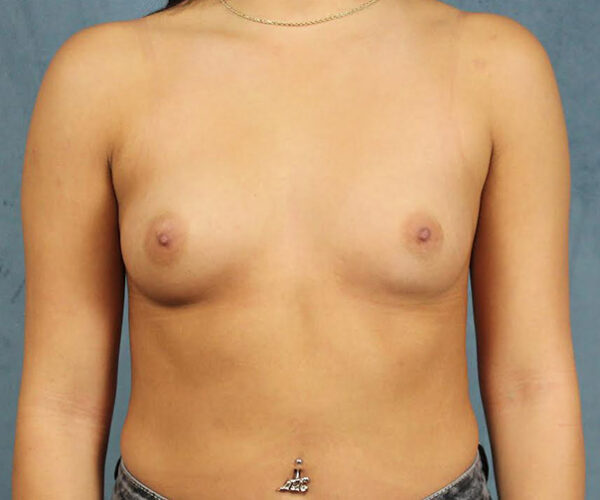
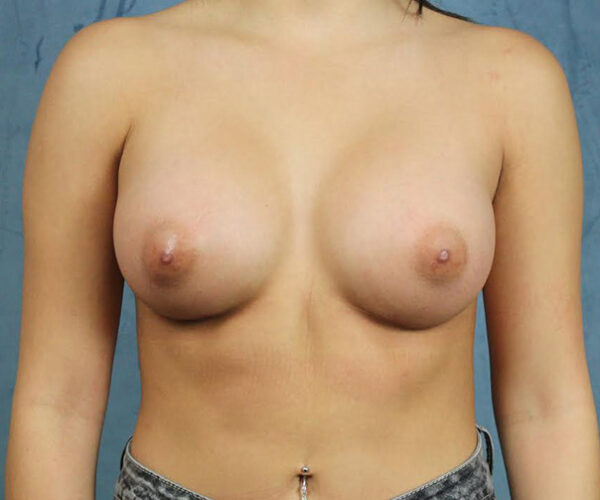
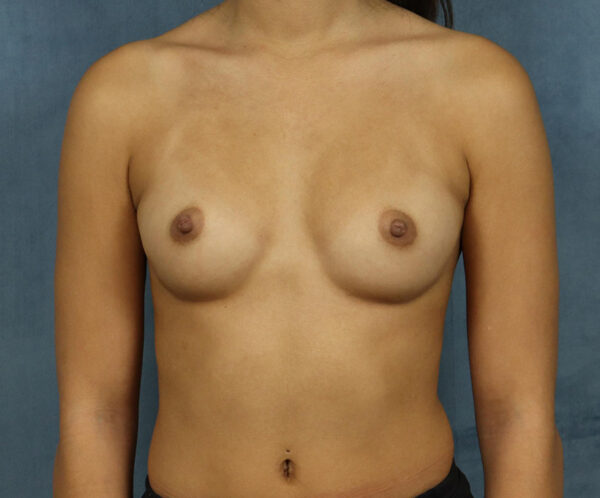
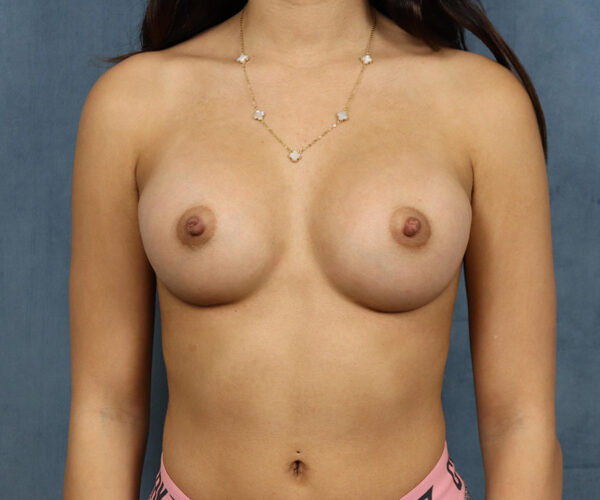
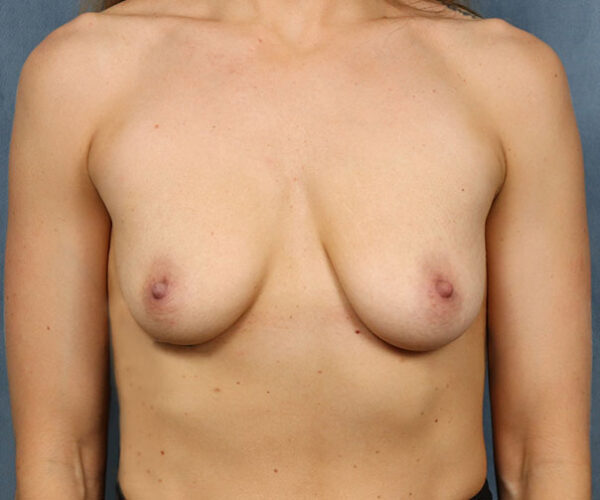
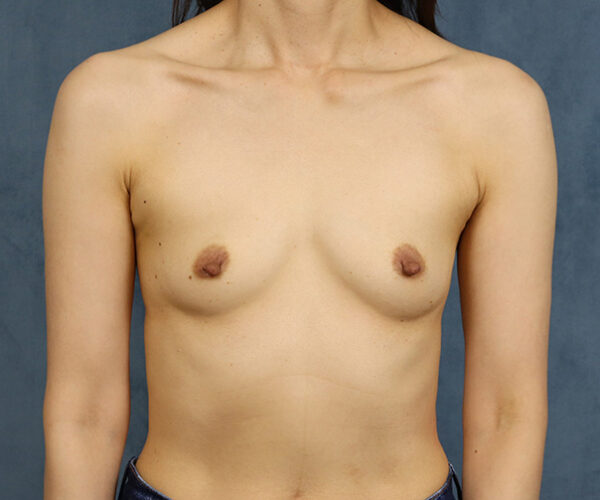
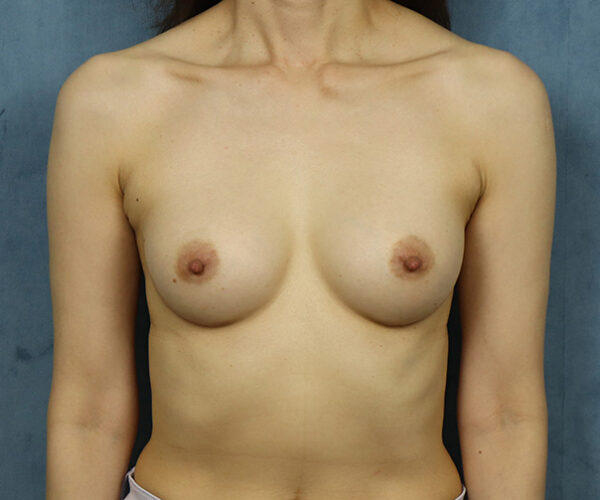
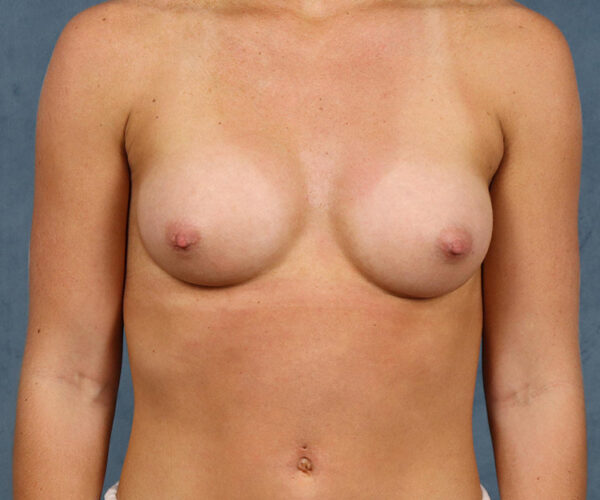
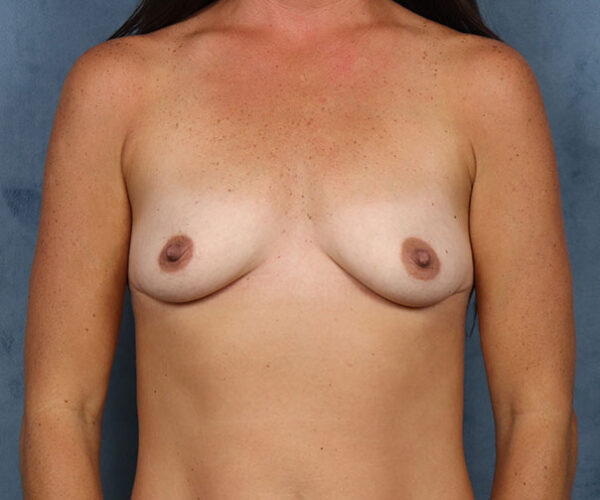
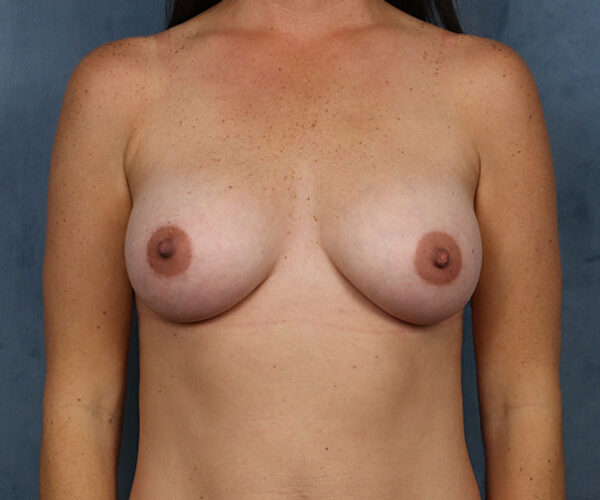
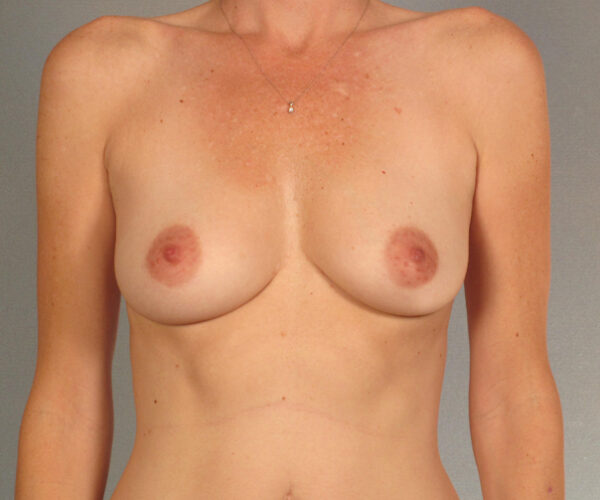
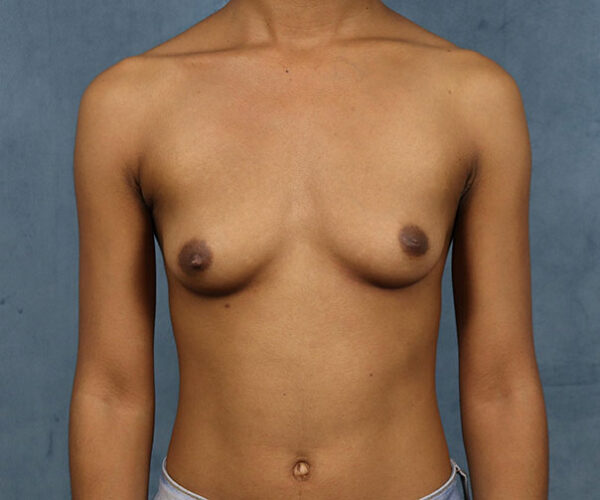
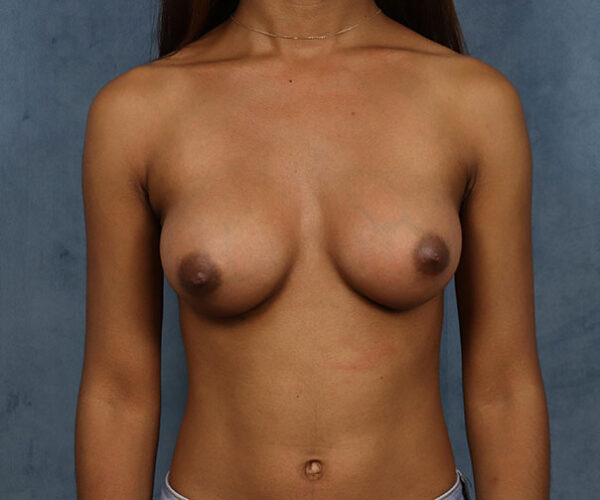
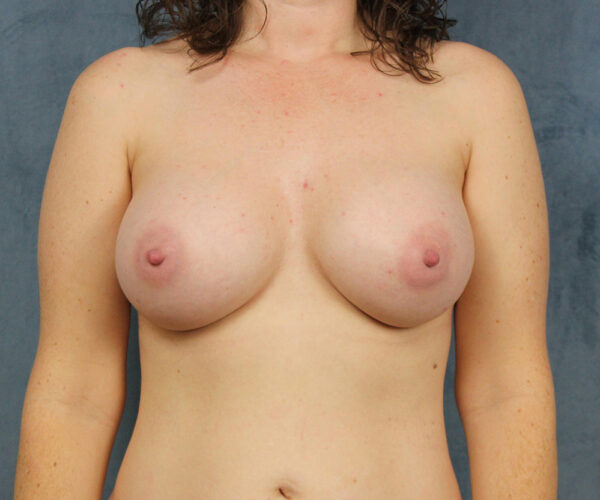
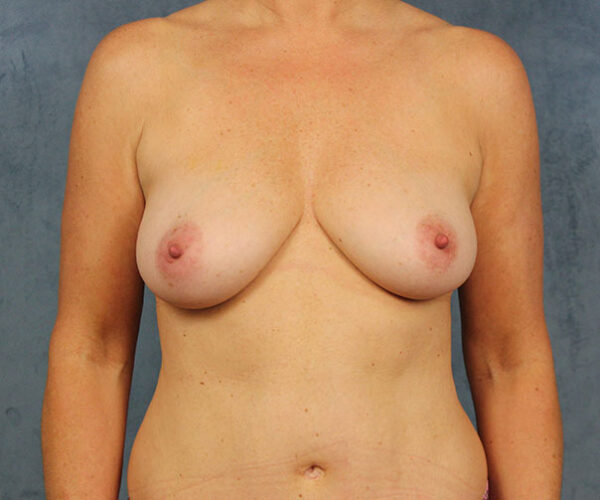
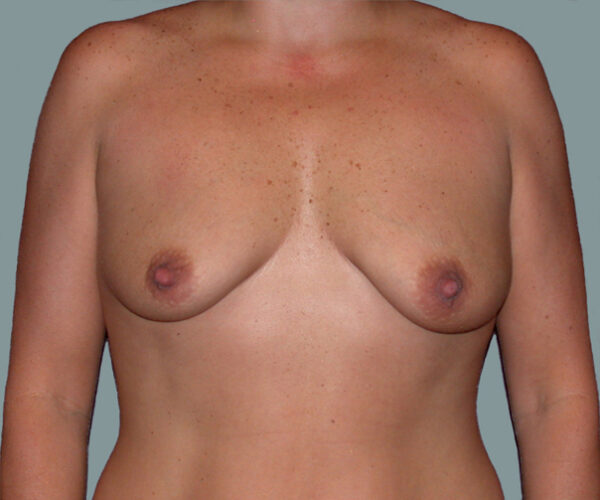
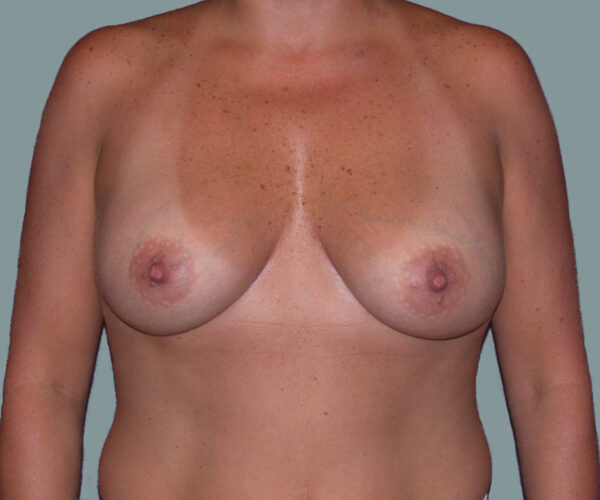
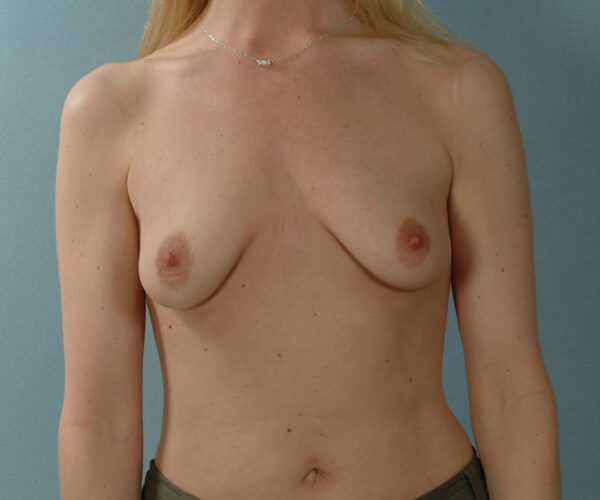
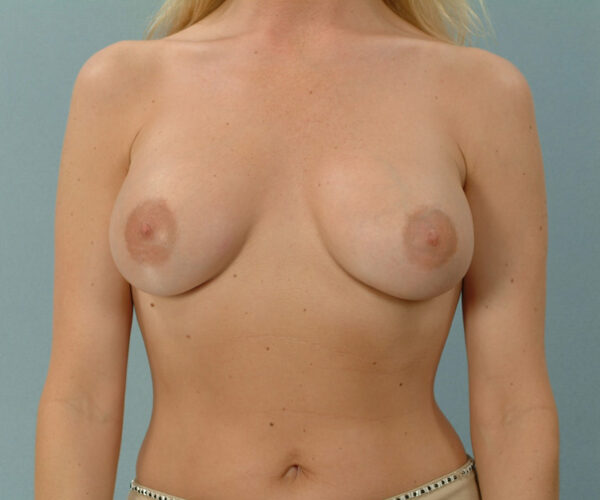
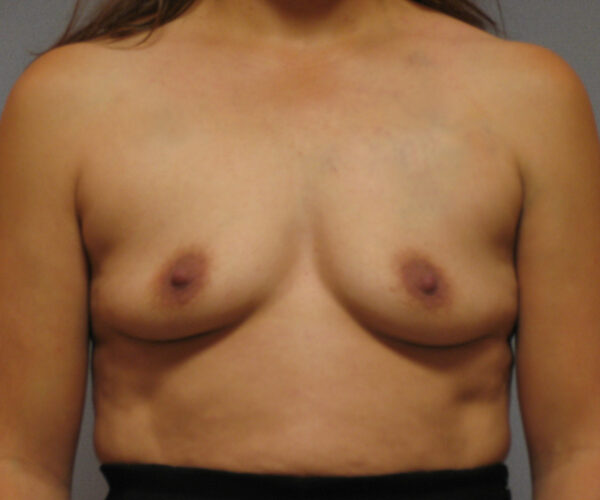
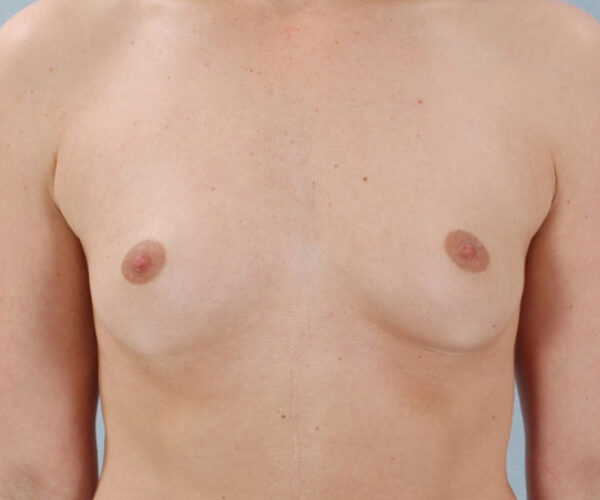
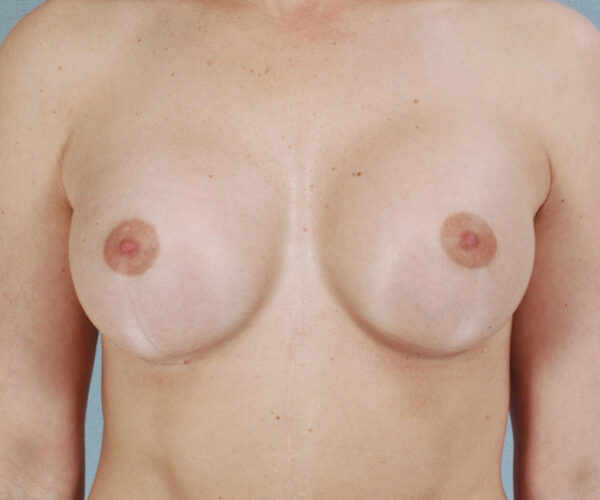
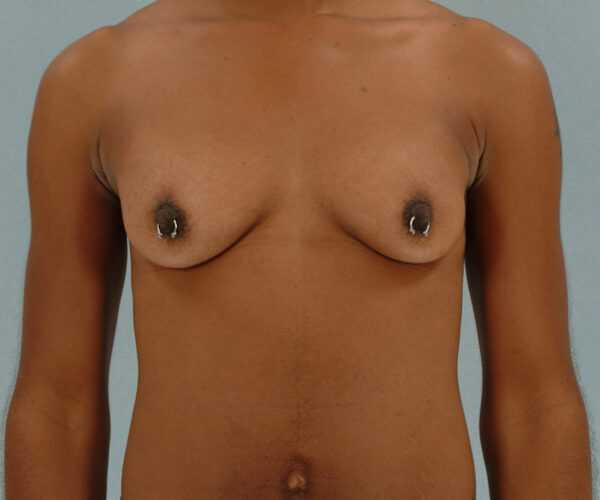
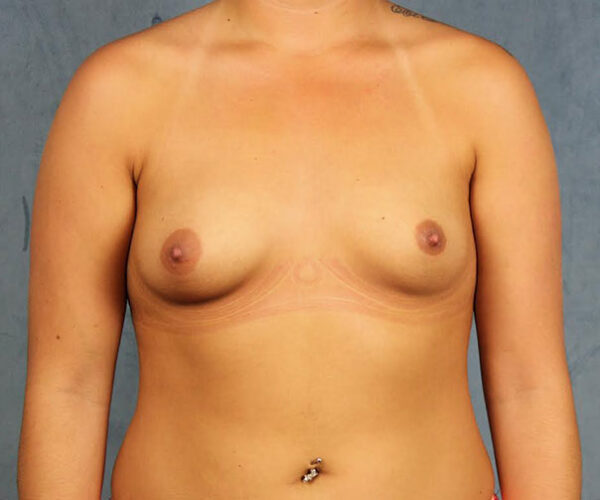
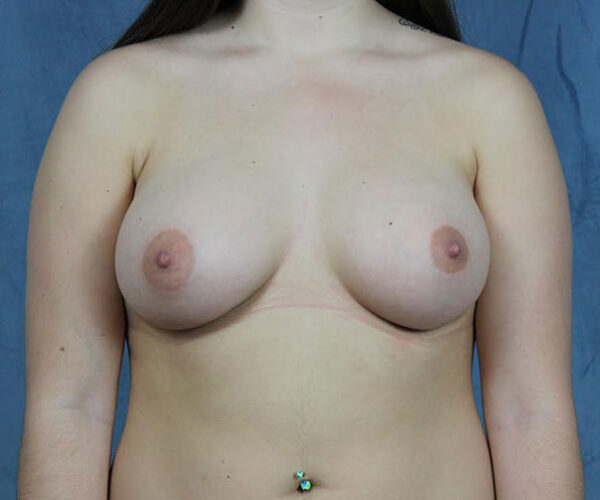
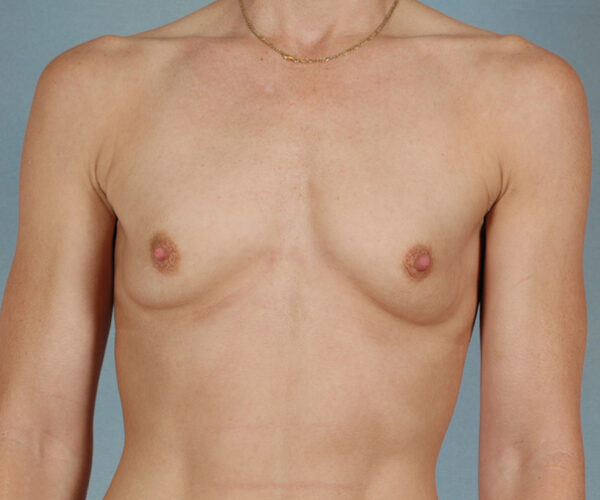
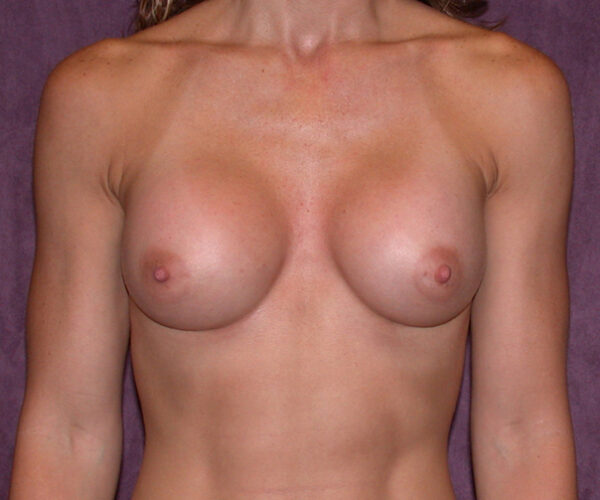
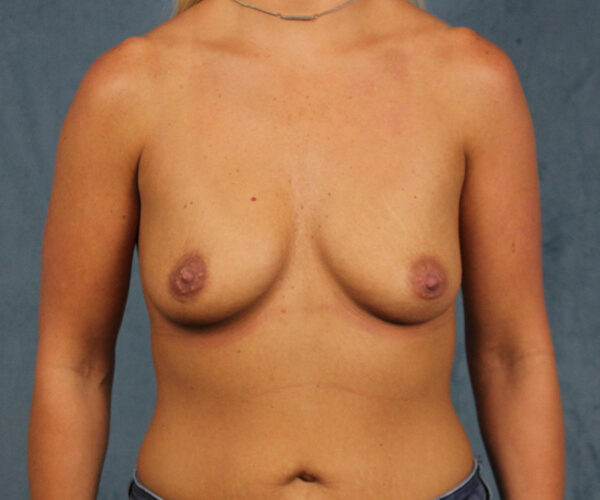
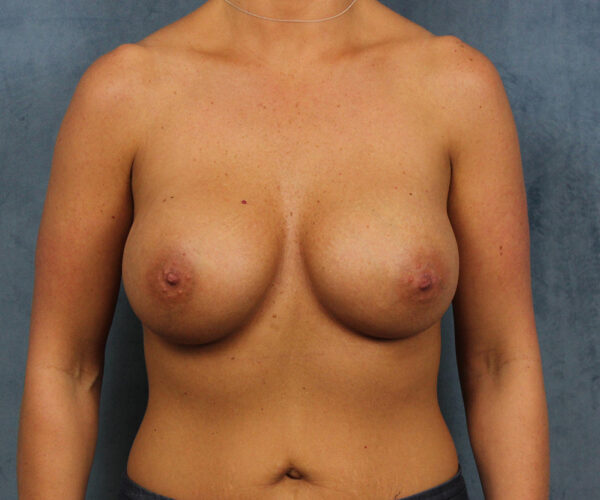
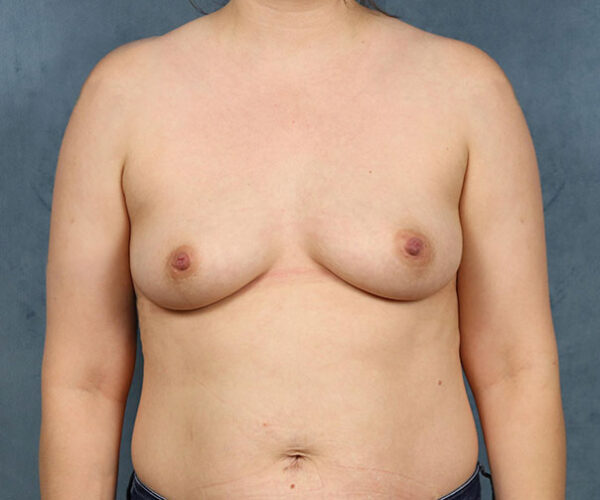
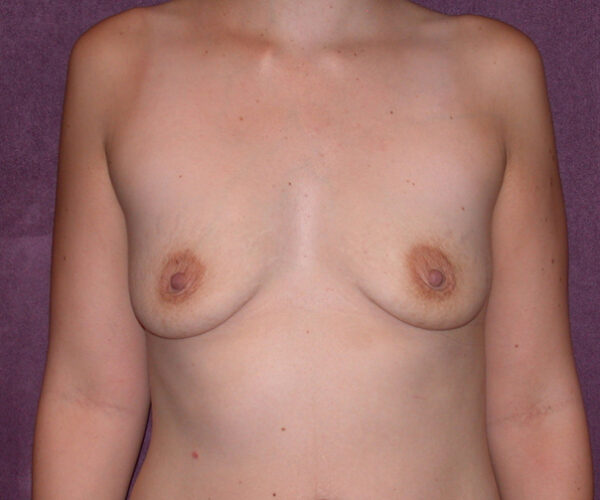
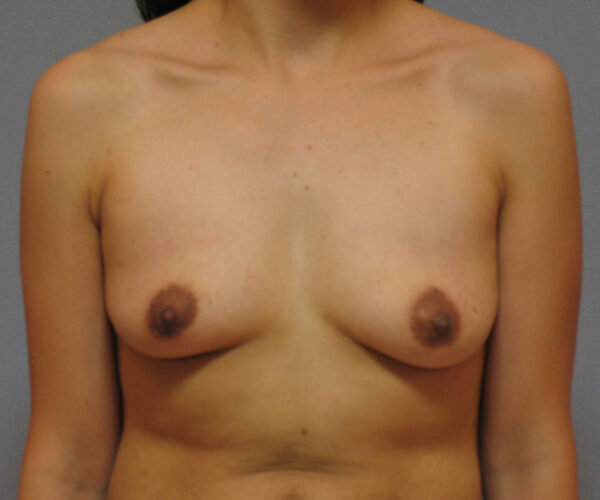
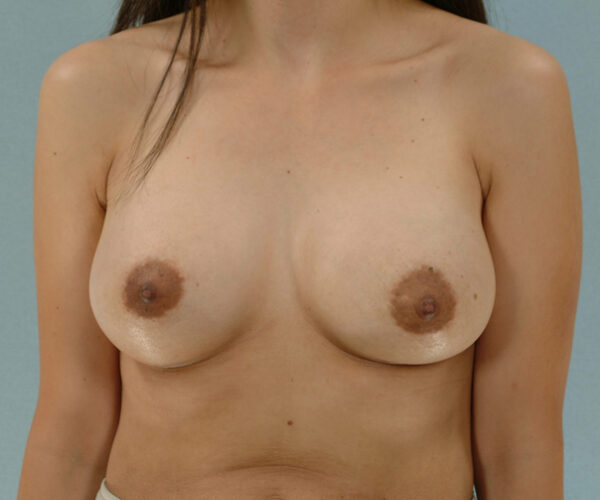
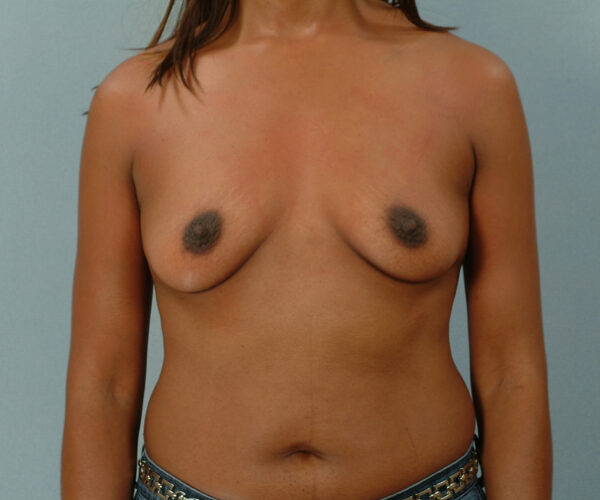
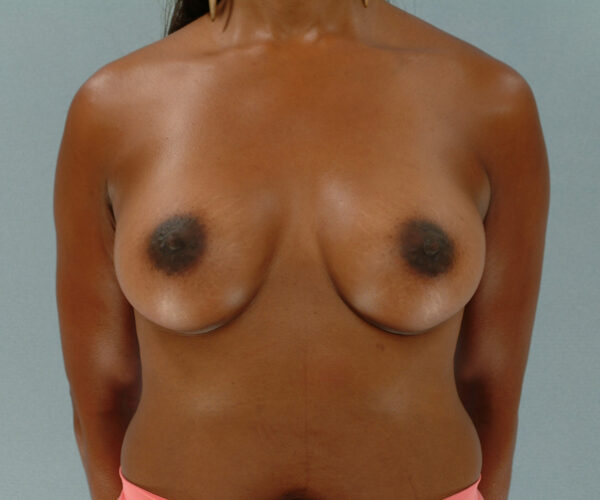
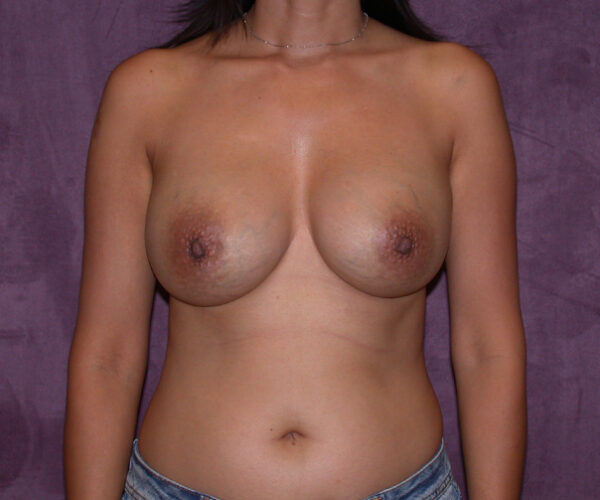
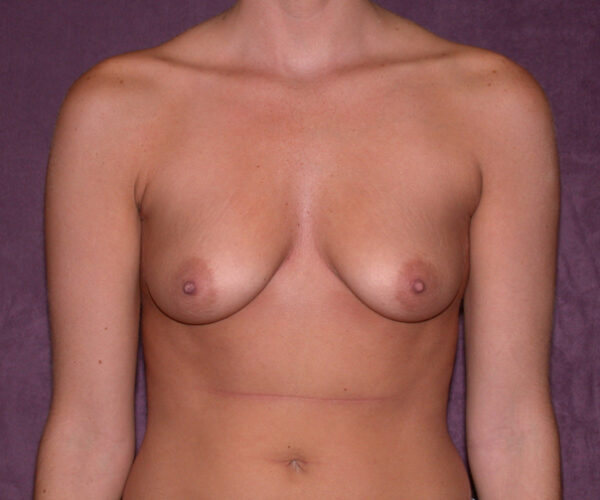
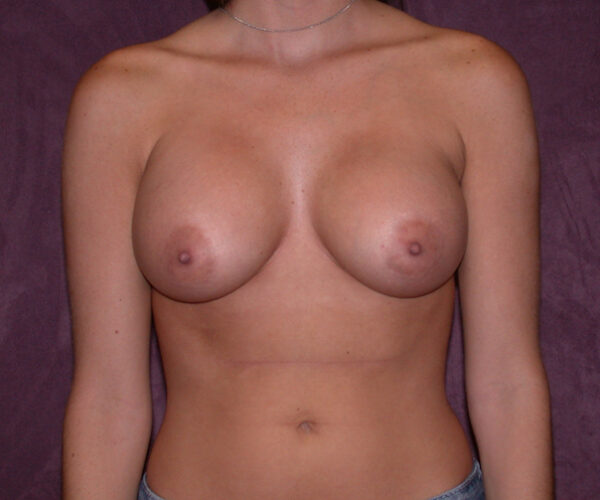
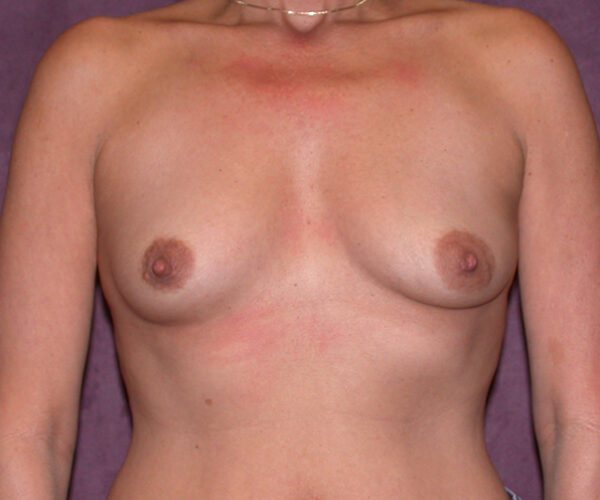
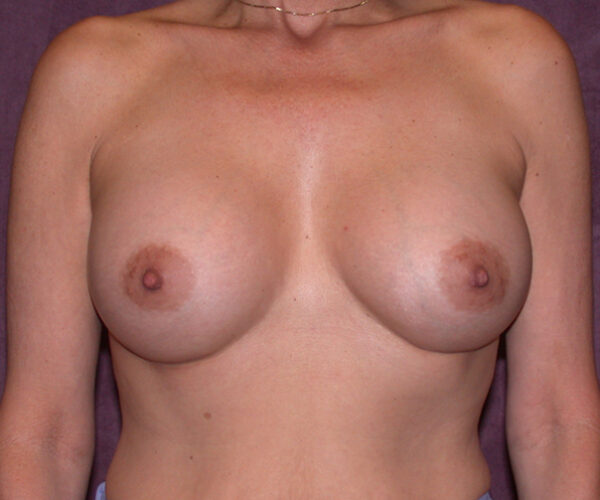
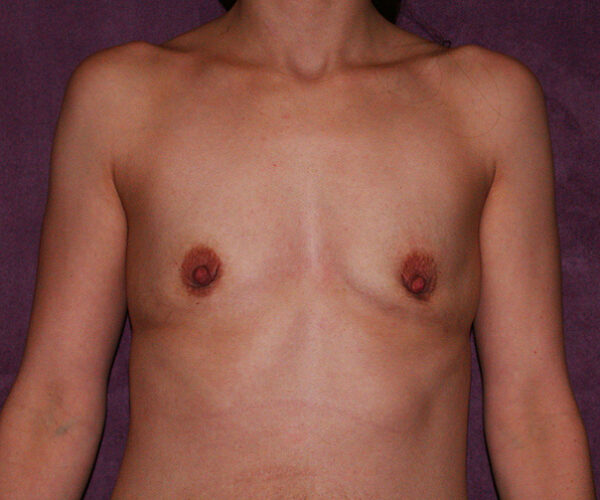
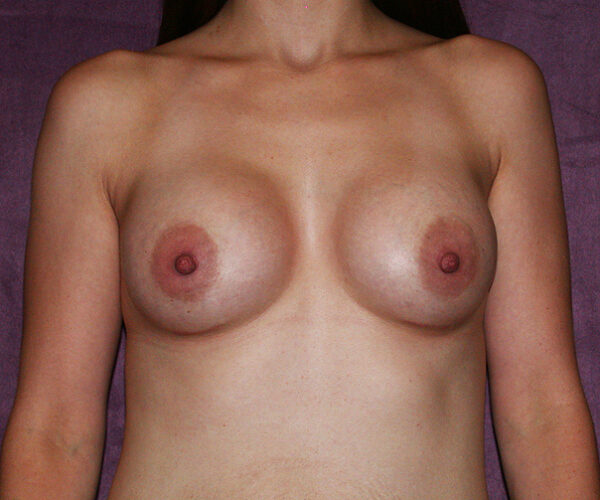
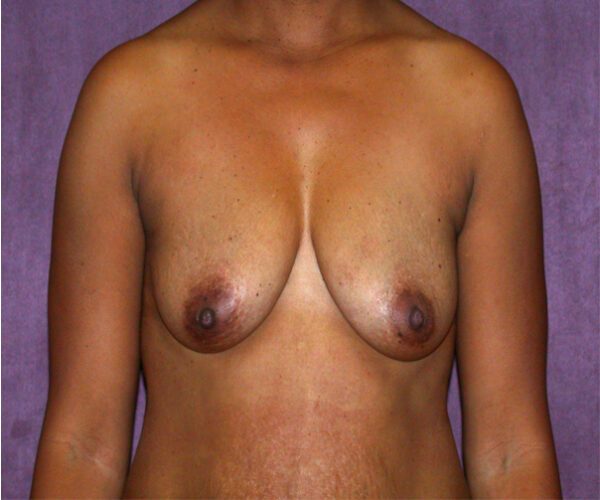
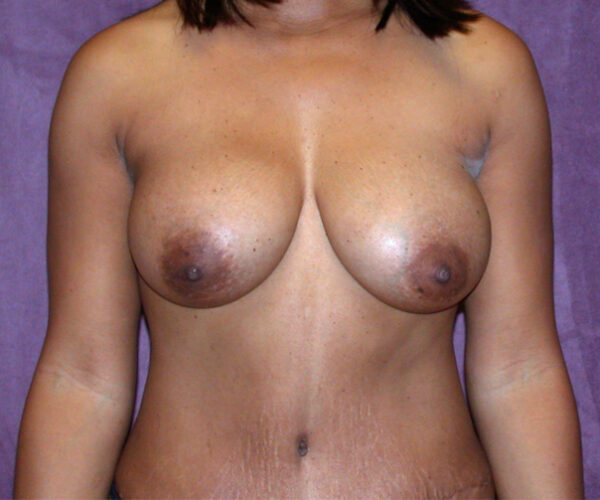
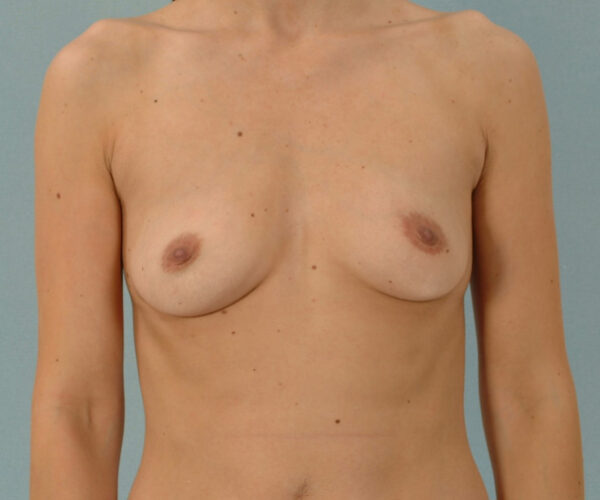
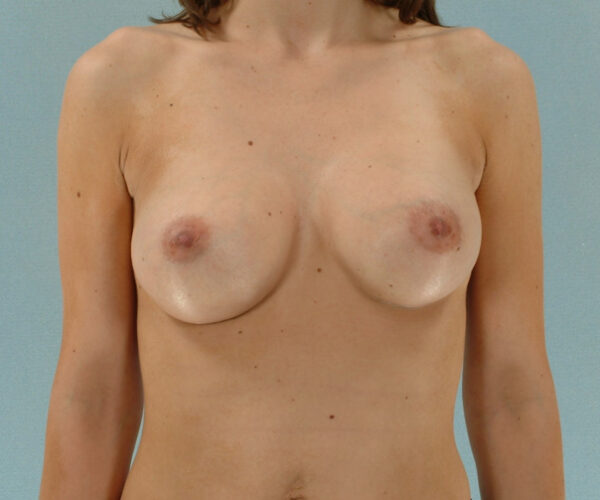
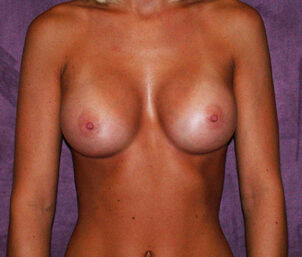
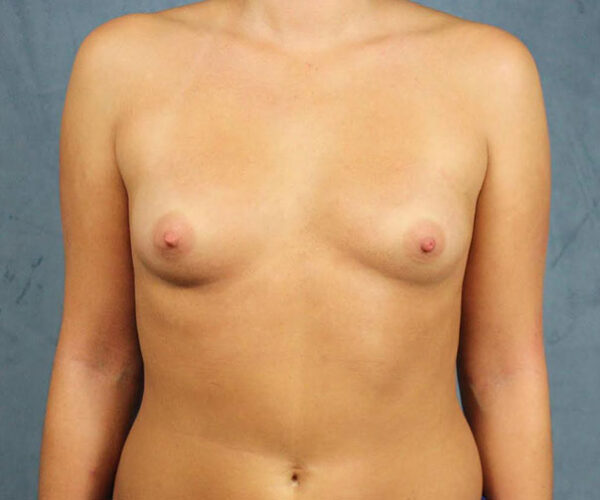
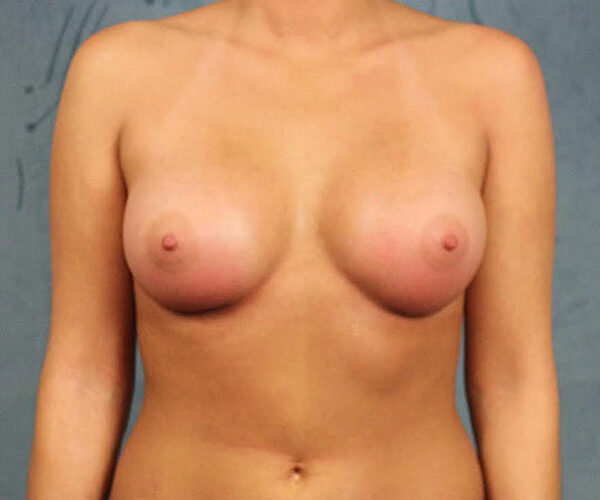
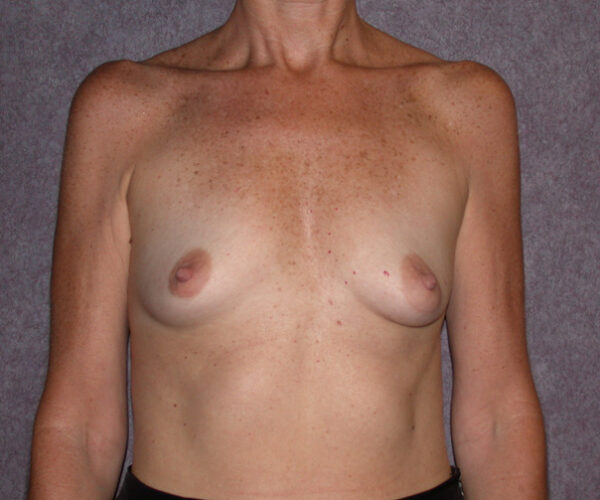
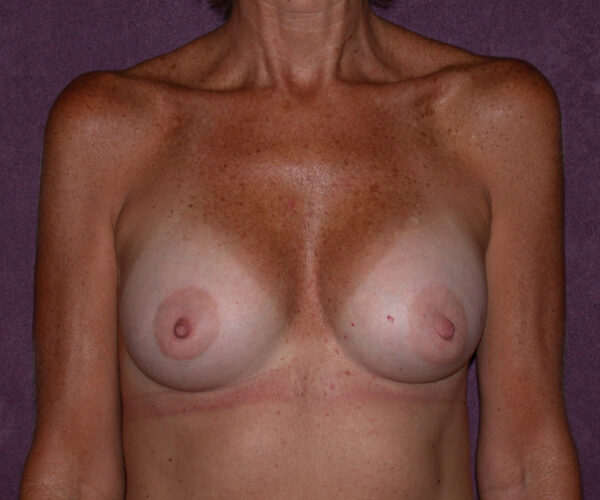
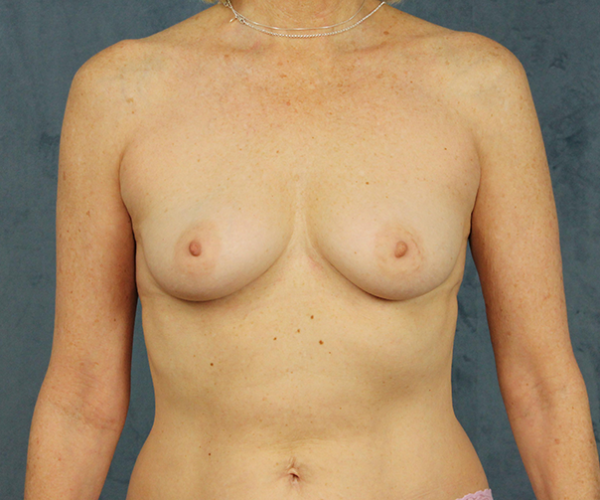
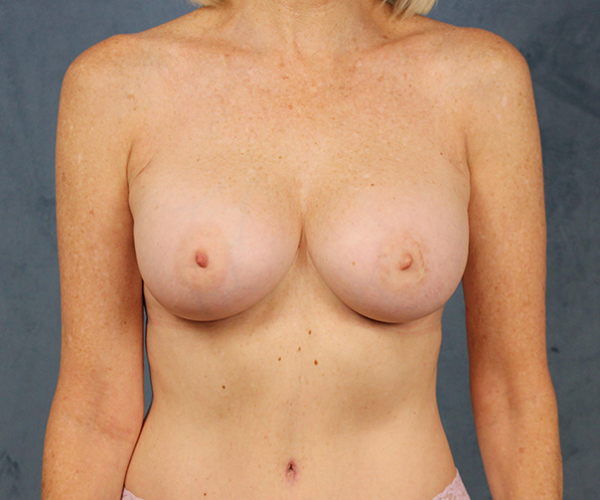
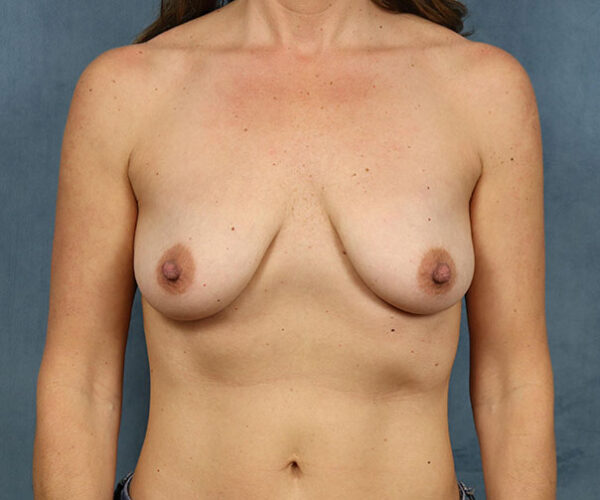
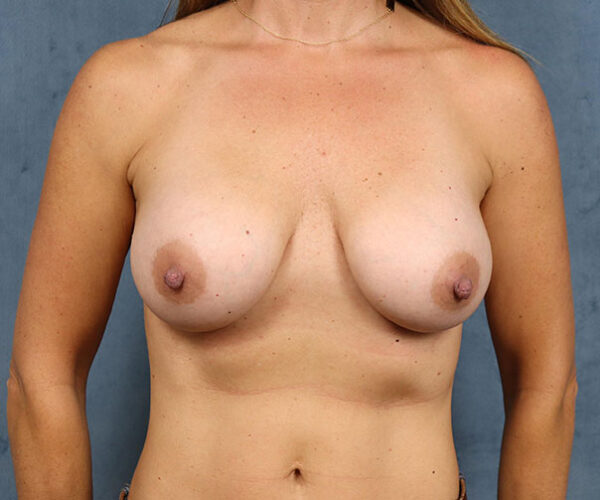
Breast Augmentation
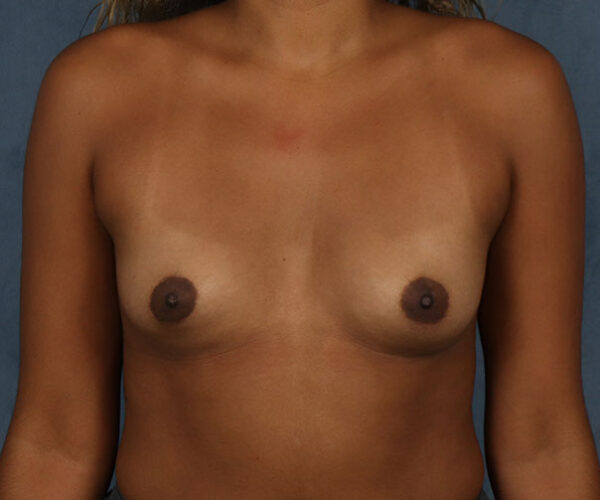
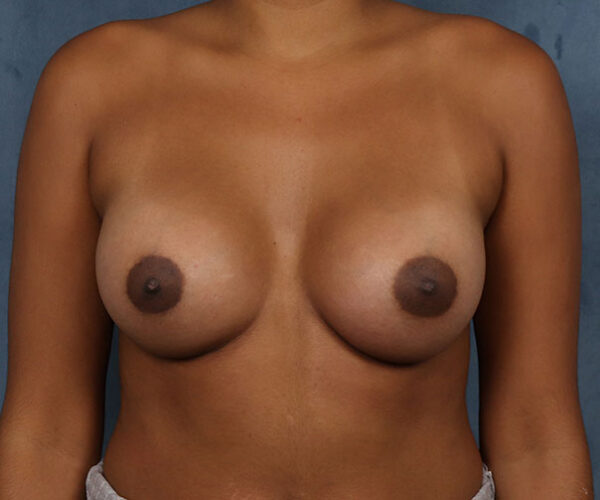
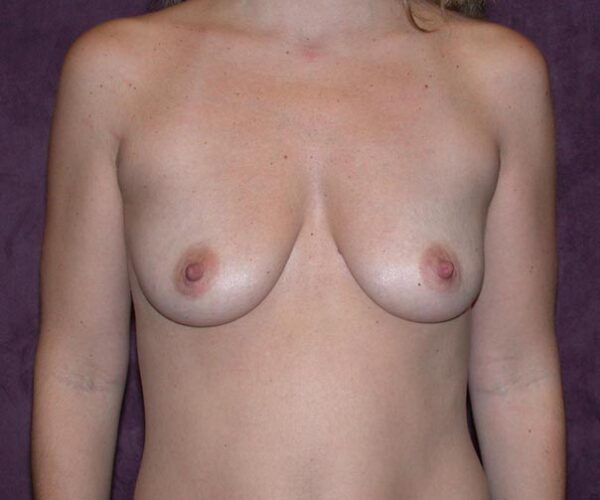
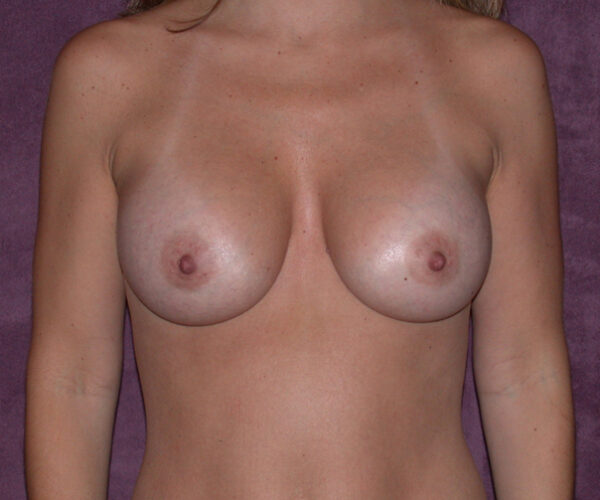
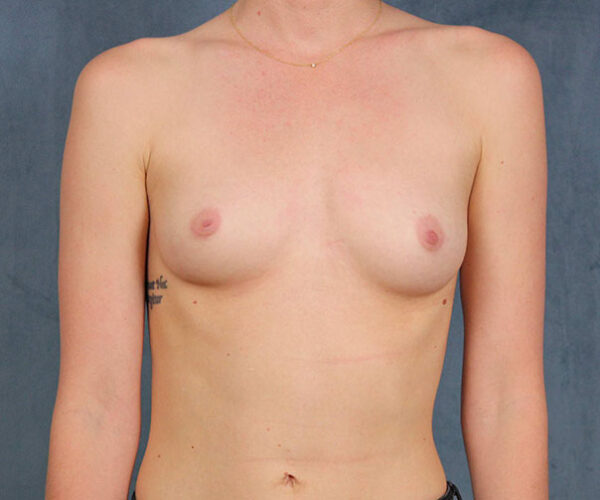
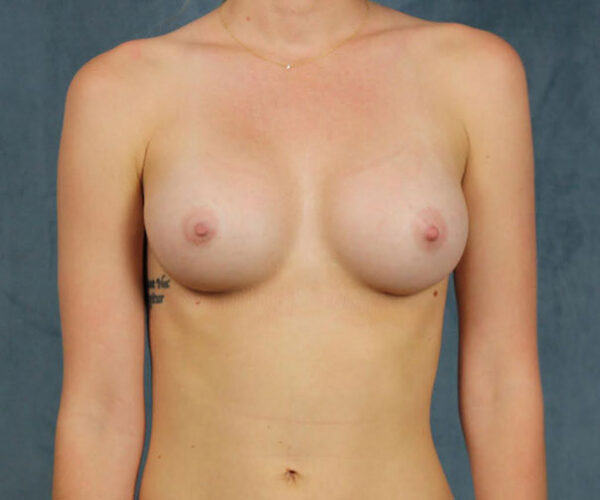
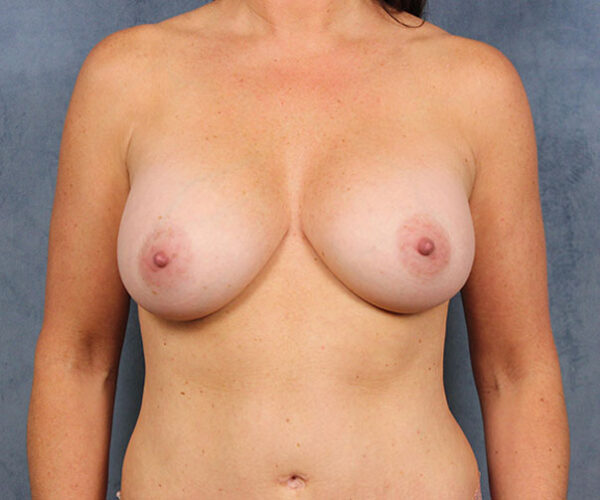
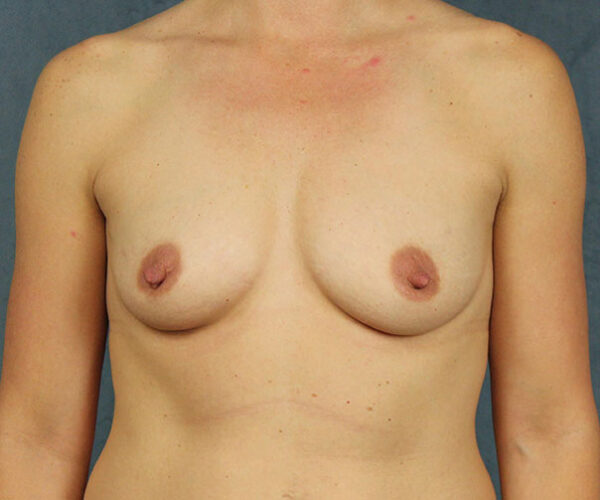
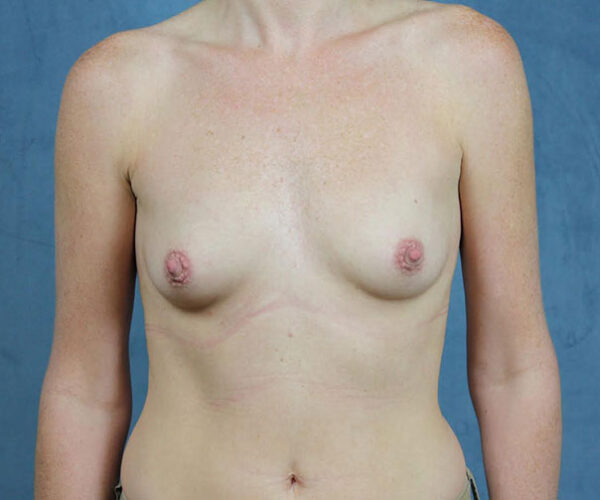
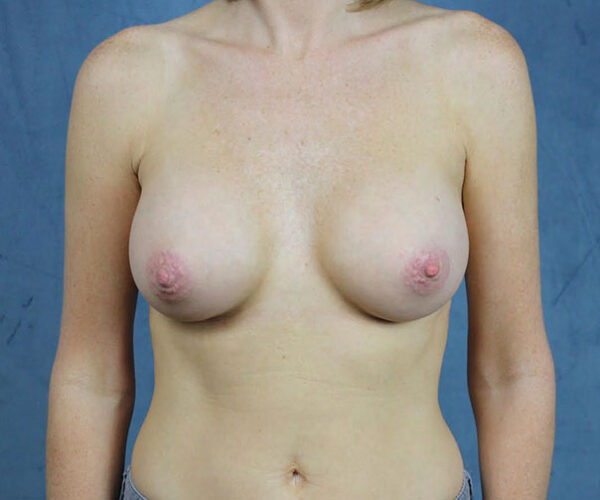
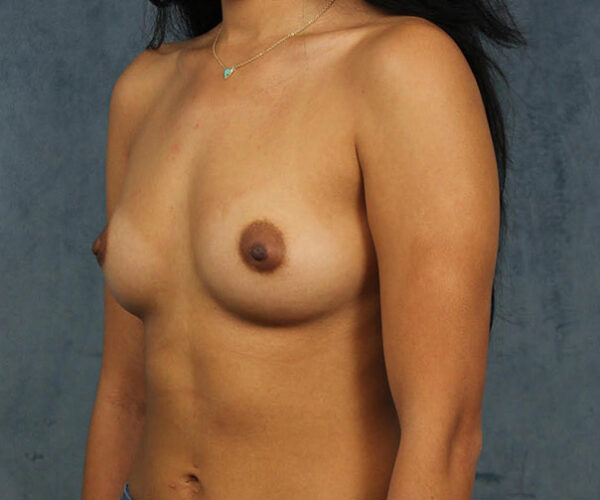
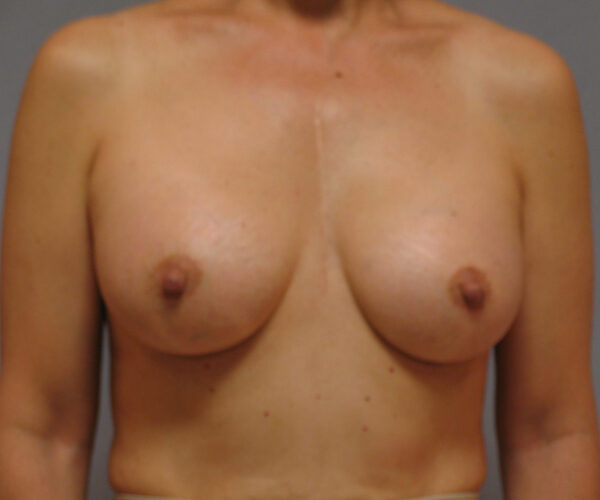
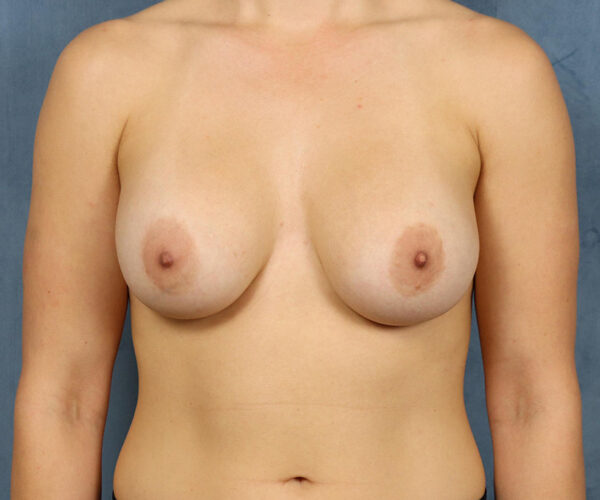
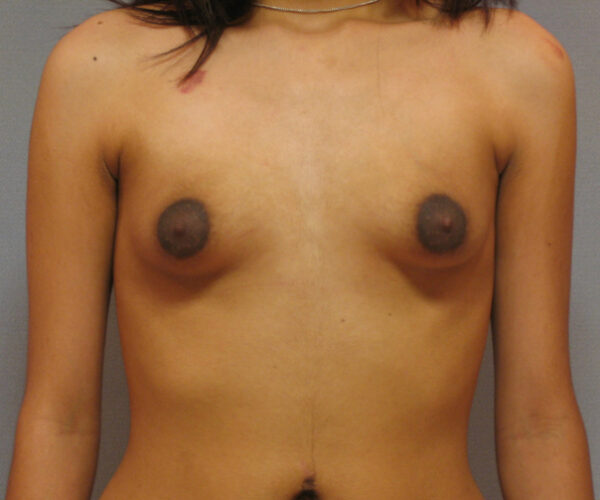
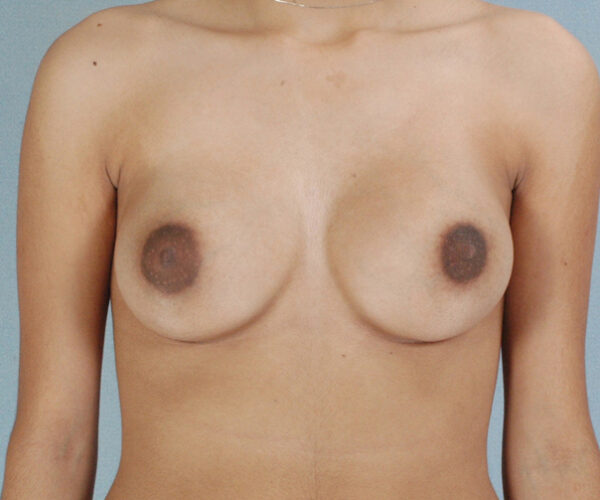
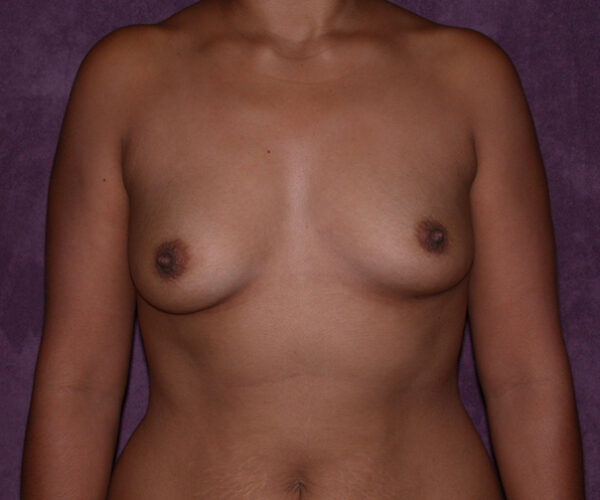
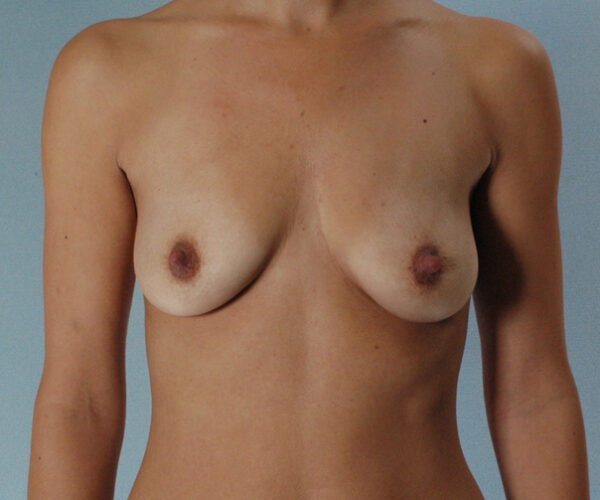
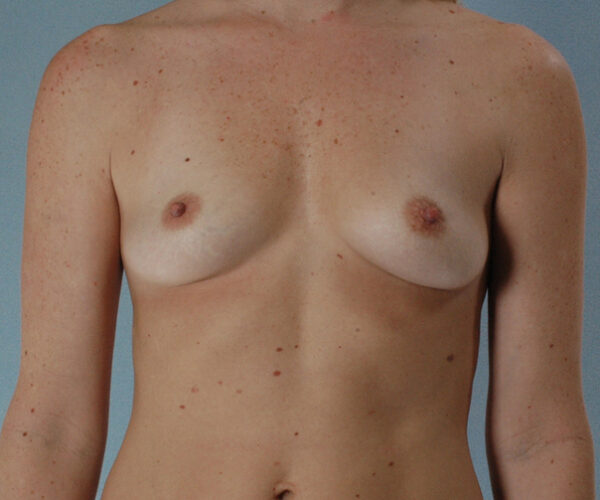
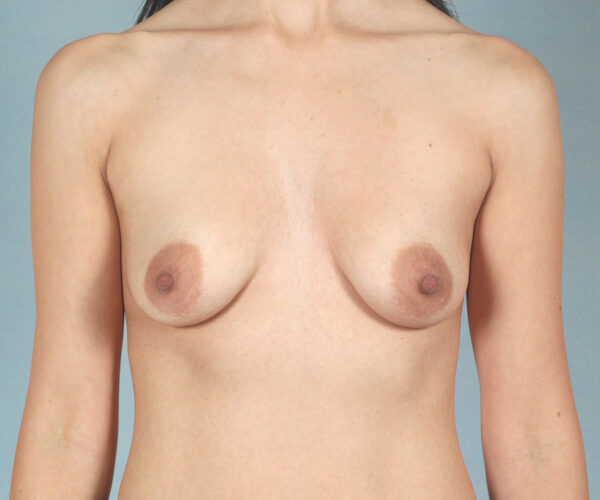
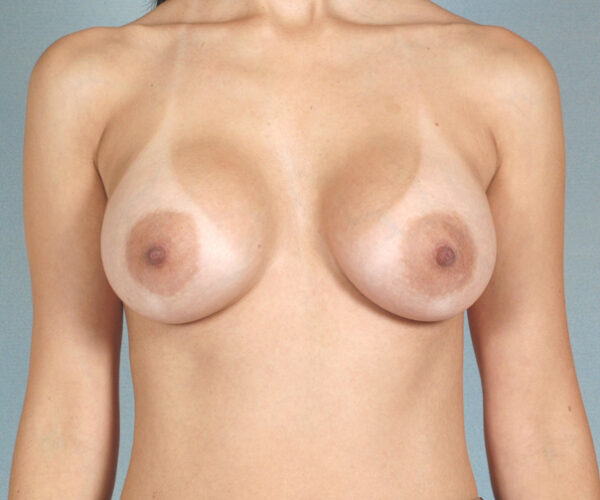
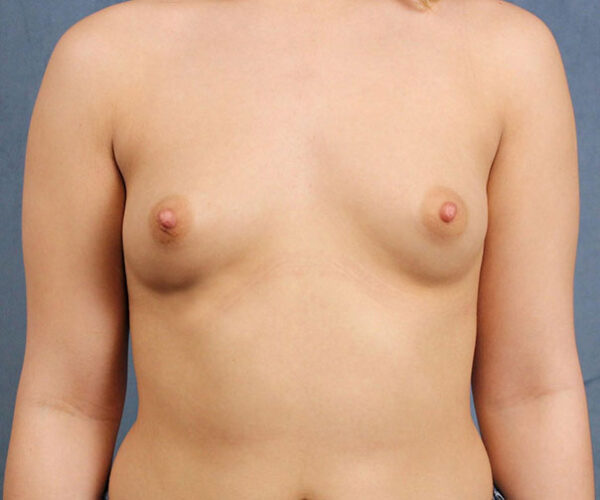
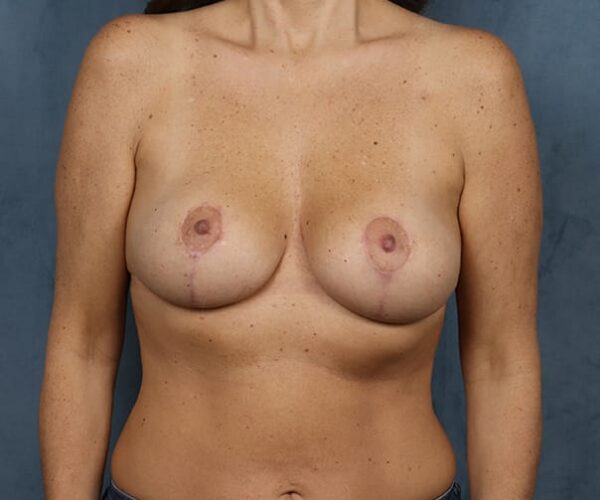
Patient 1
View More Details
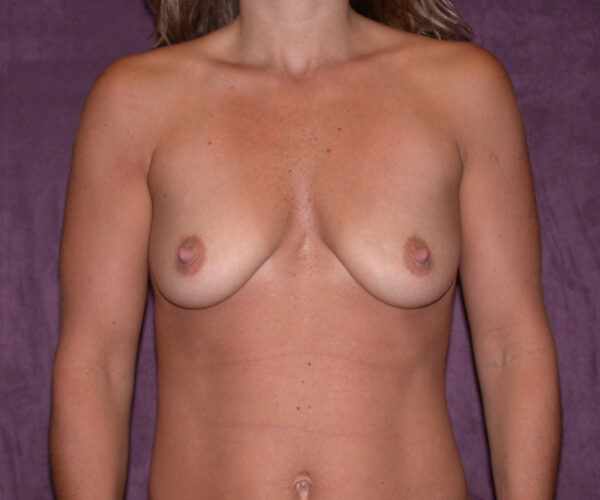
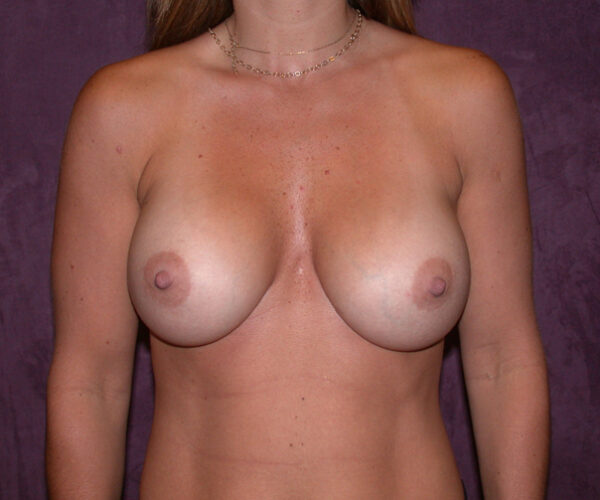
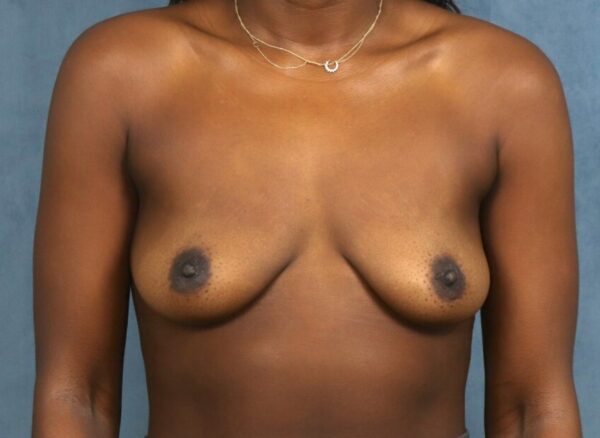
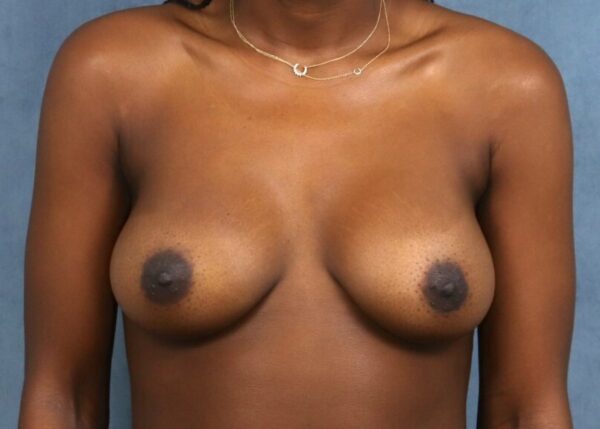
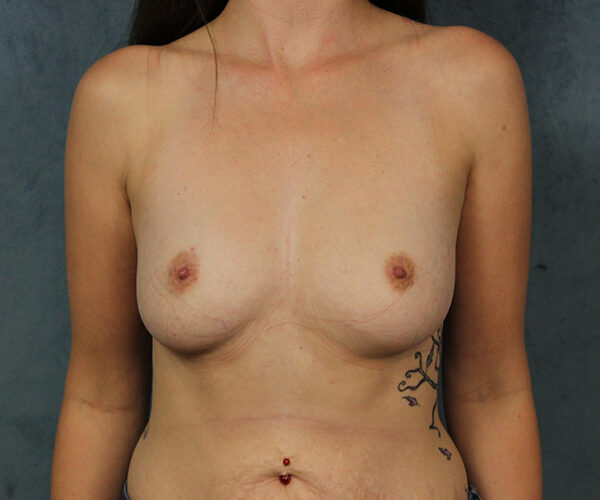
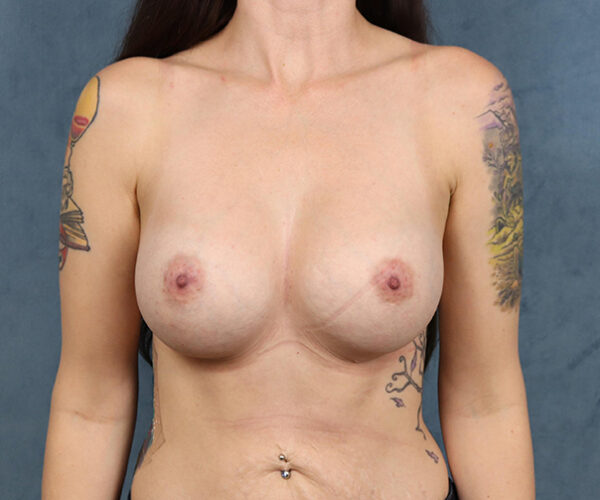
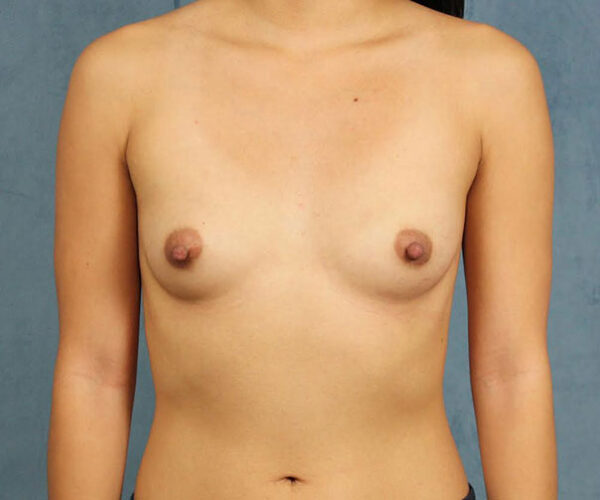
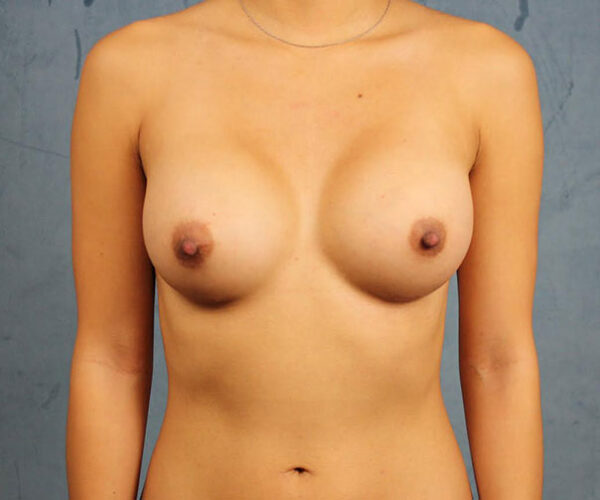
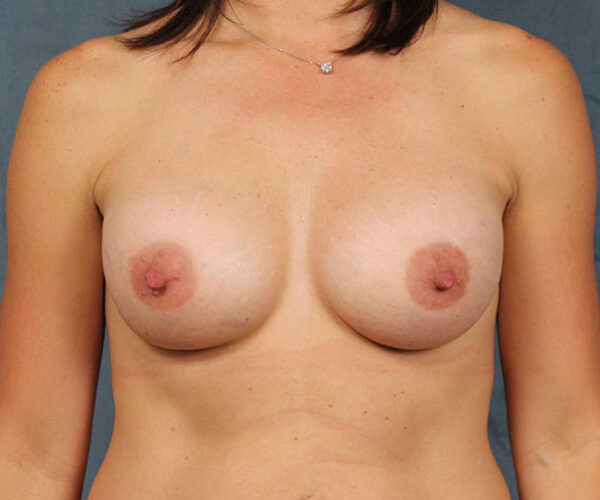
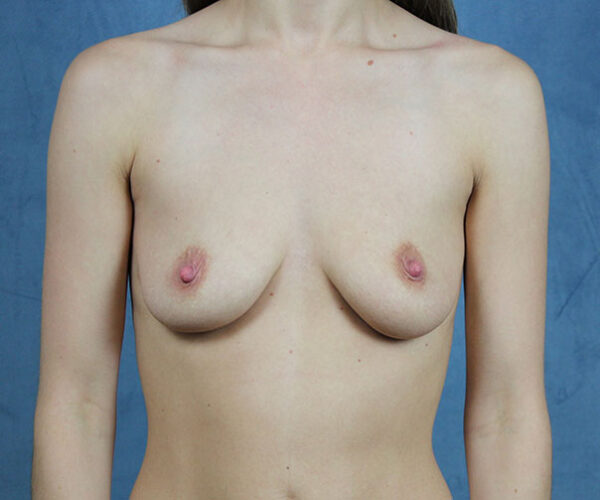
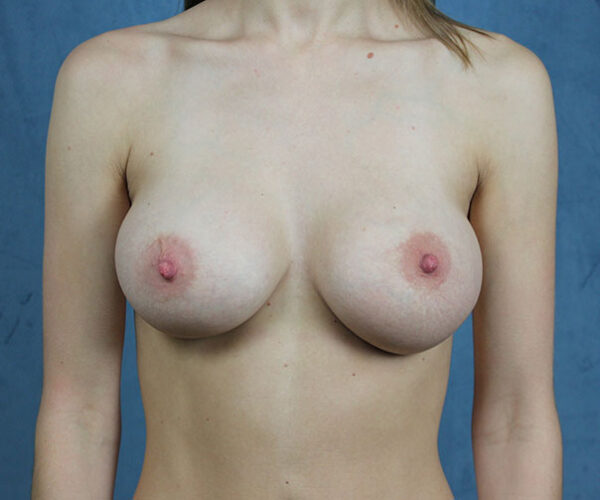
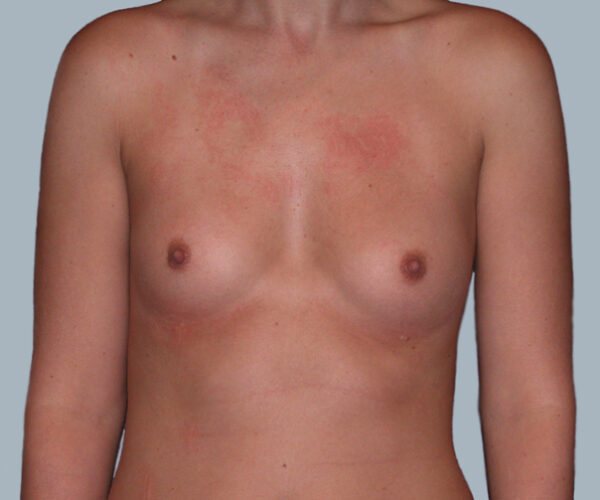
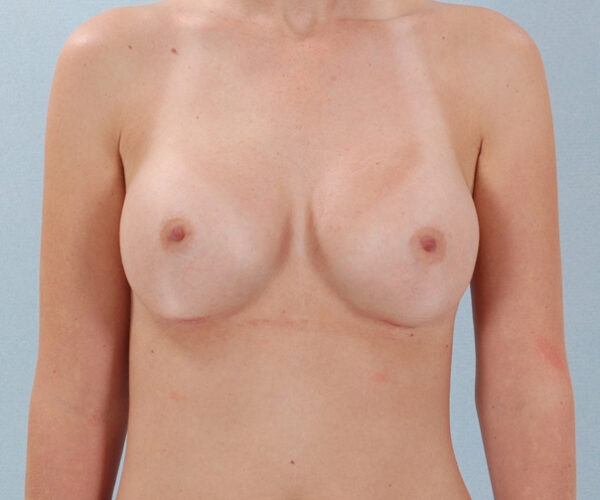
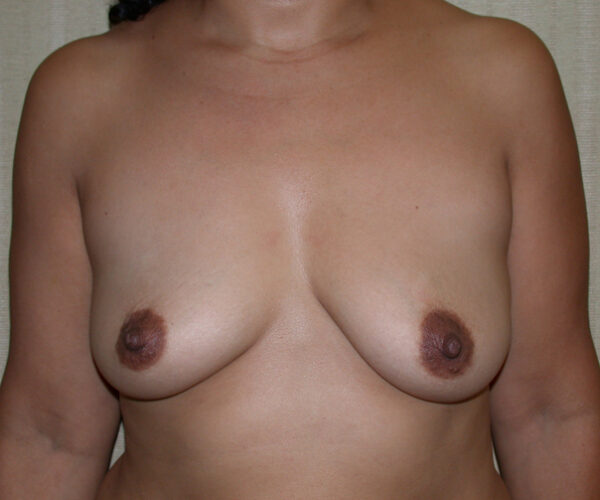
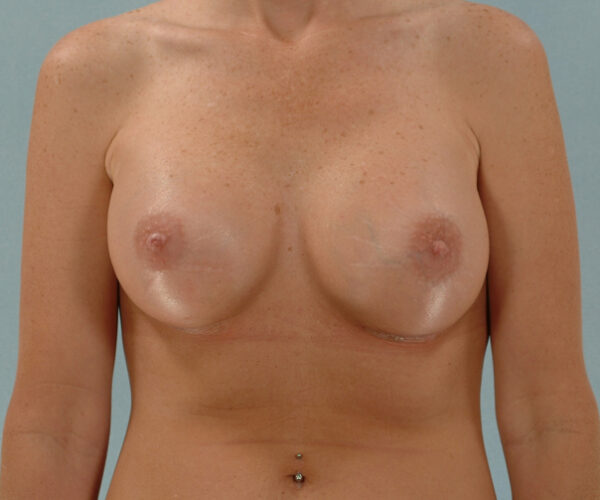
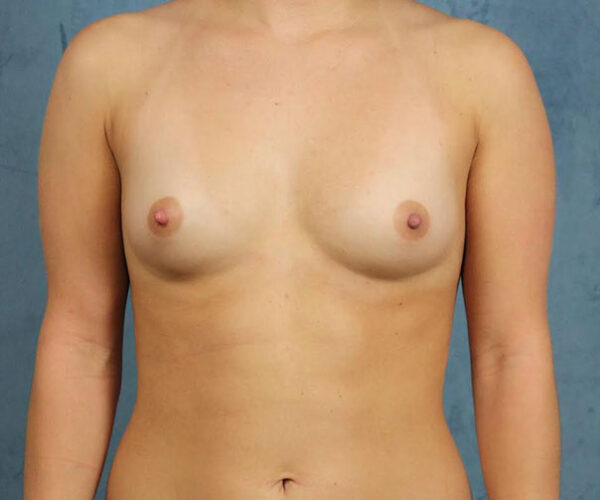
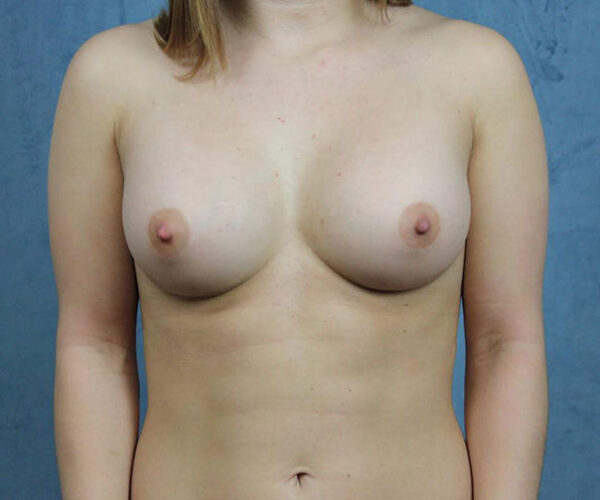
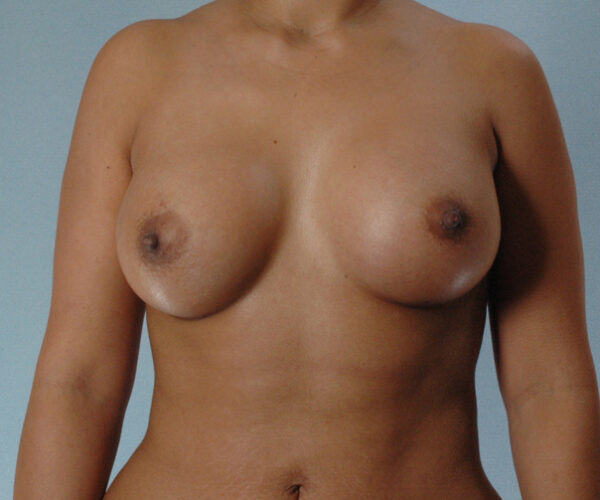
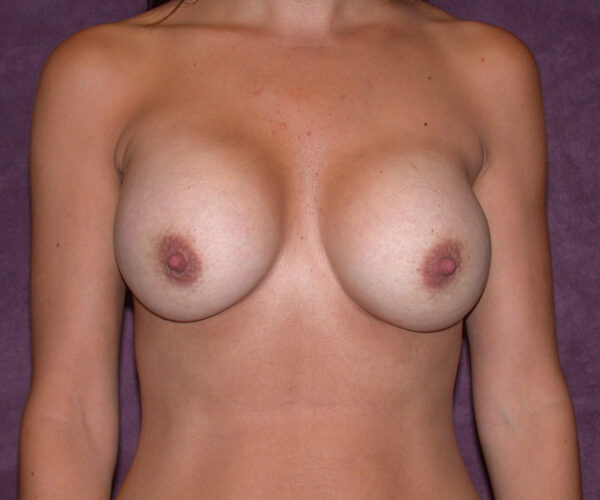
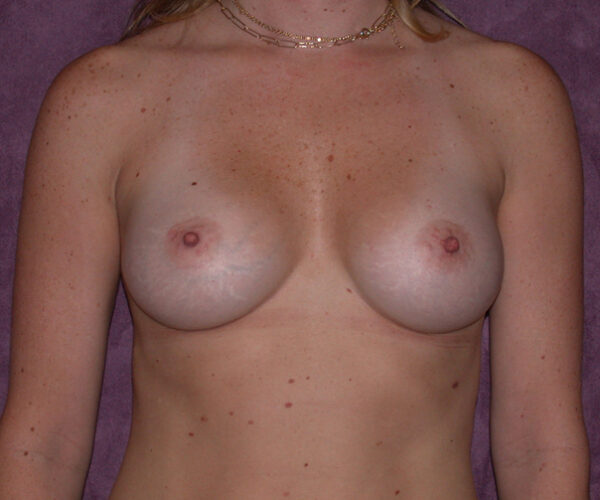
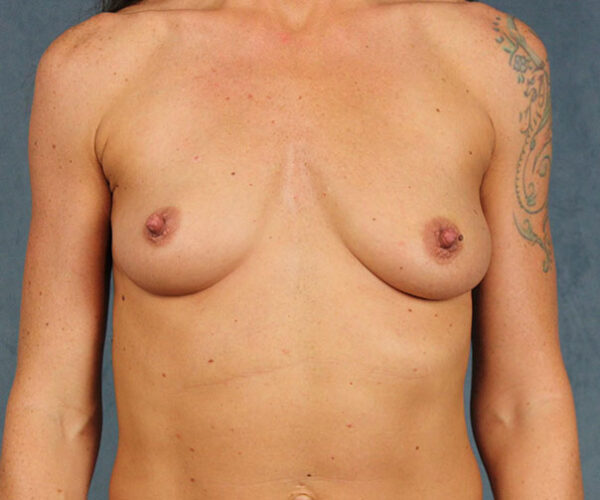
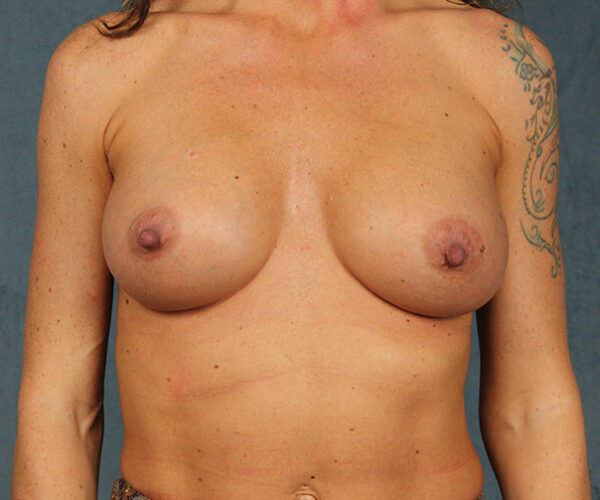
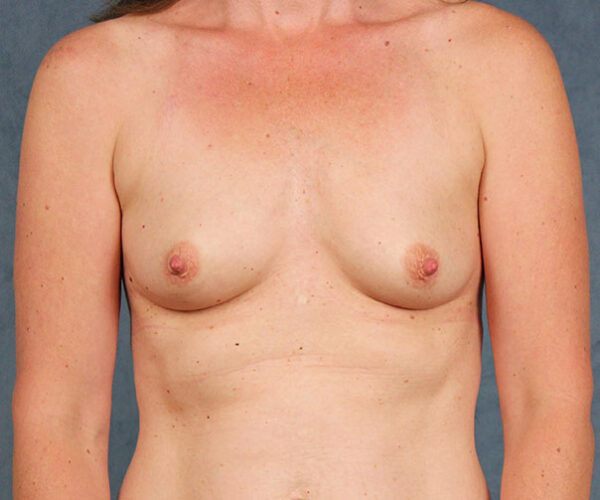
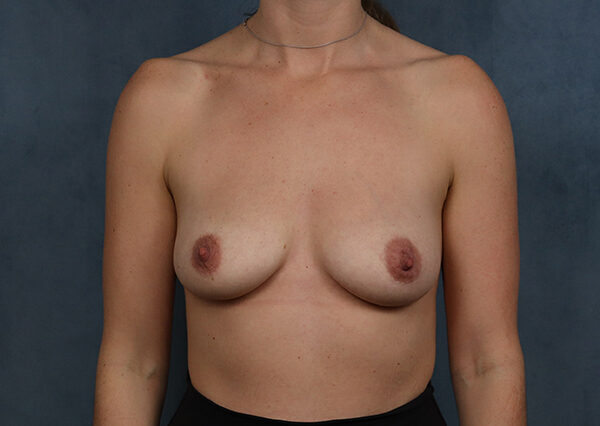
Patient 2
View More Details
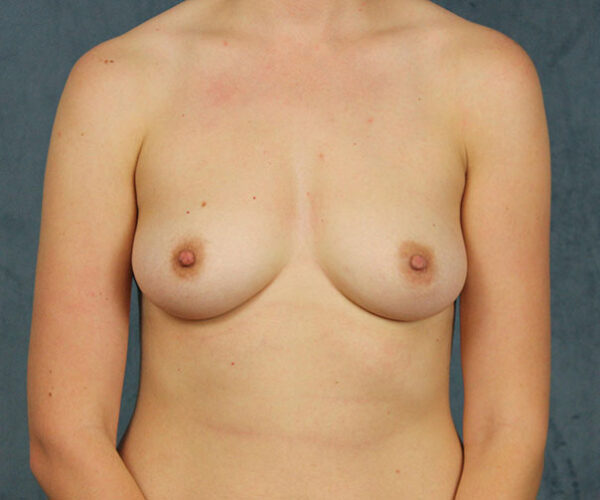
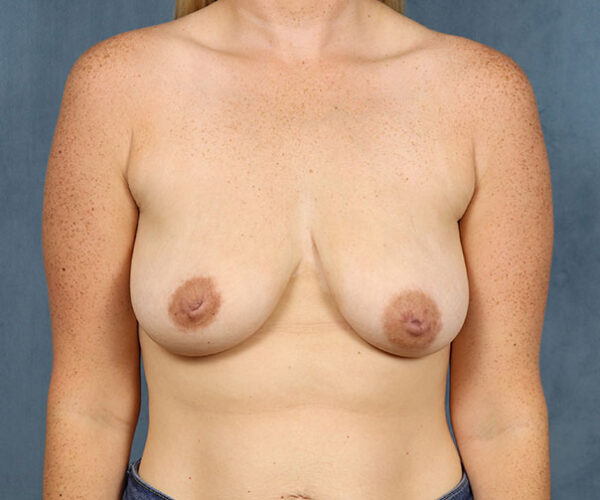
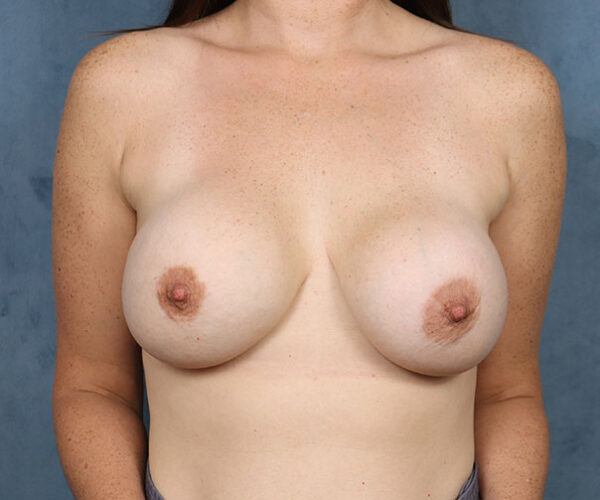
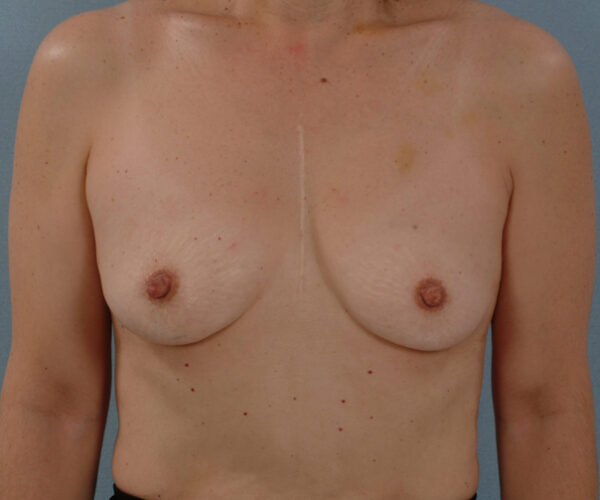
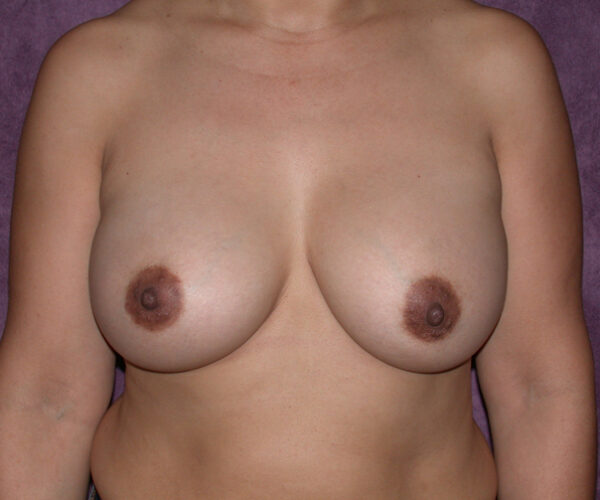
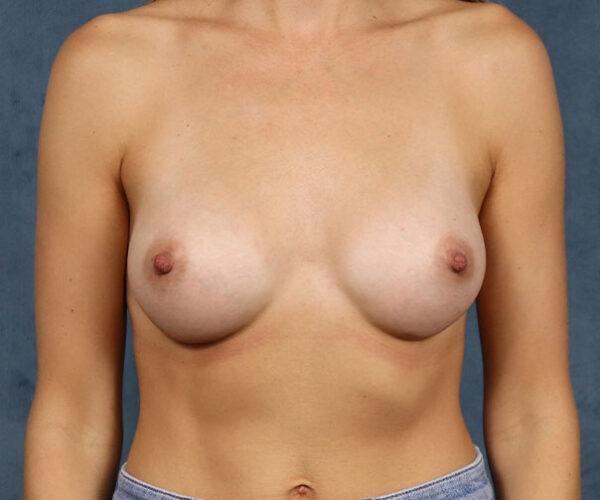
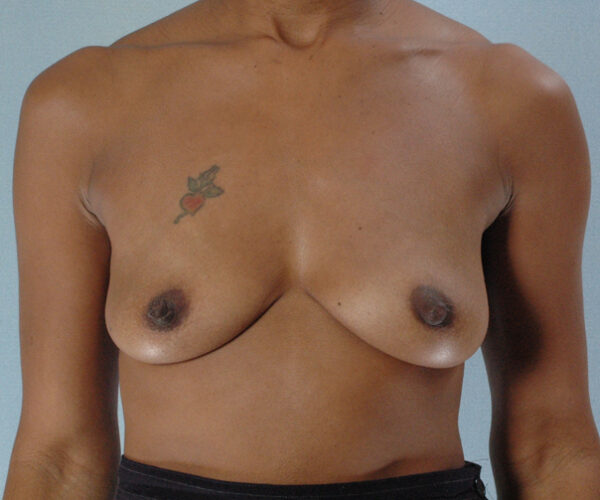
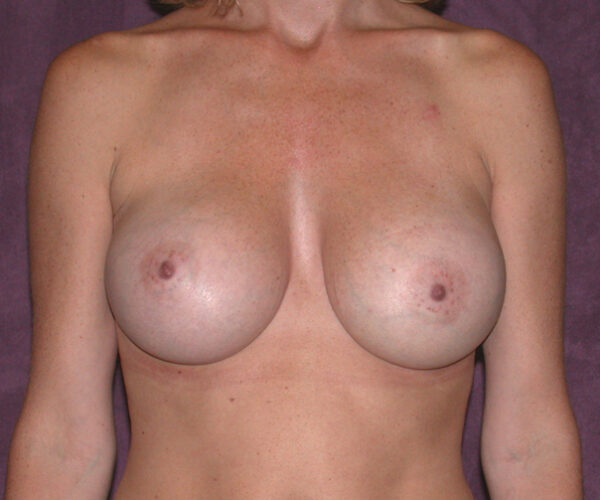
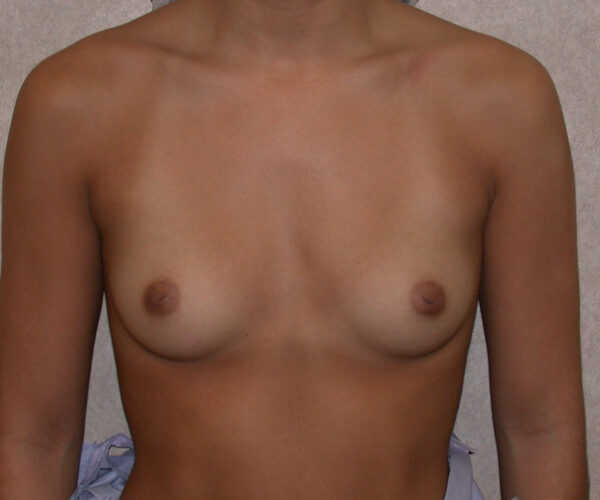
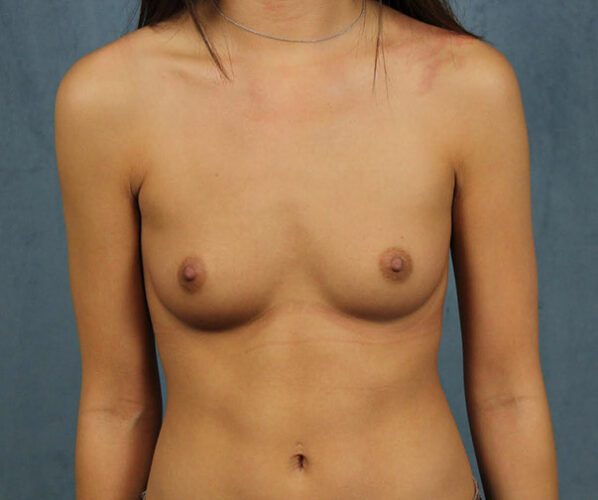
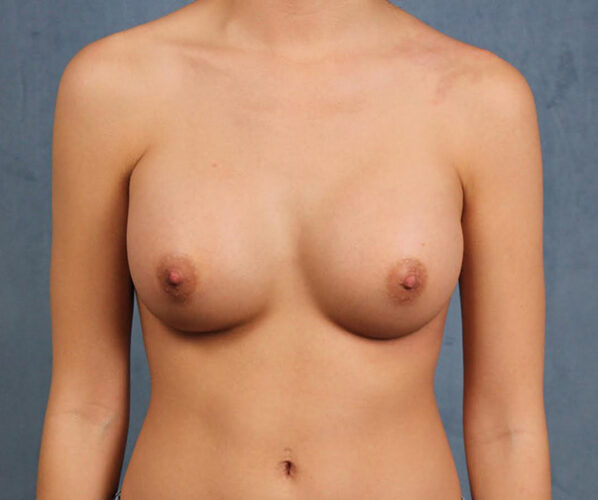
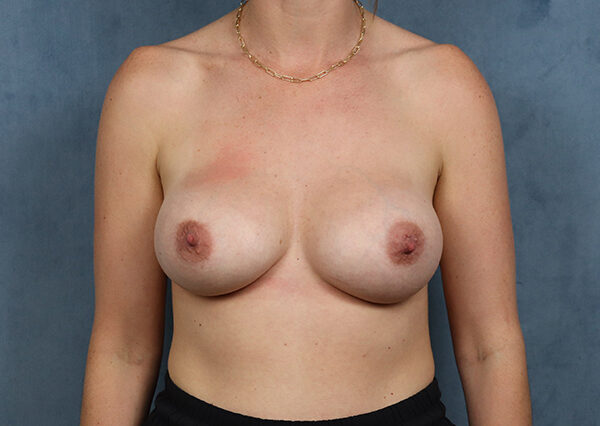
Patient 3
View More Details
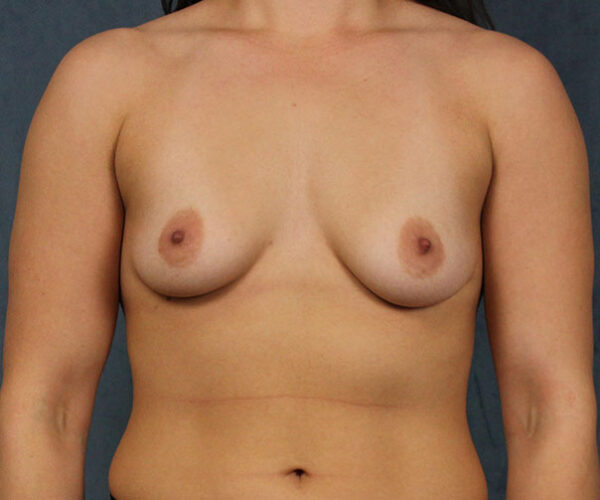
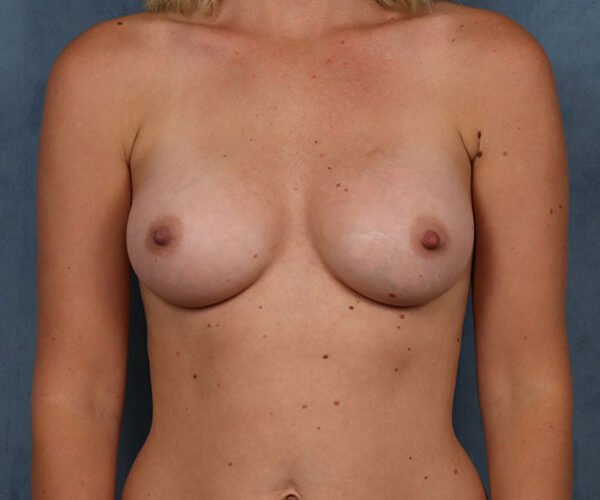
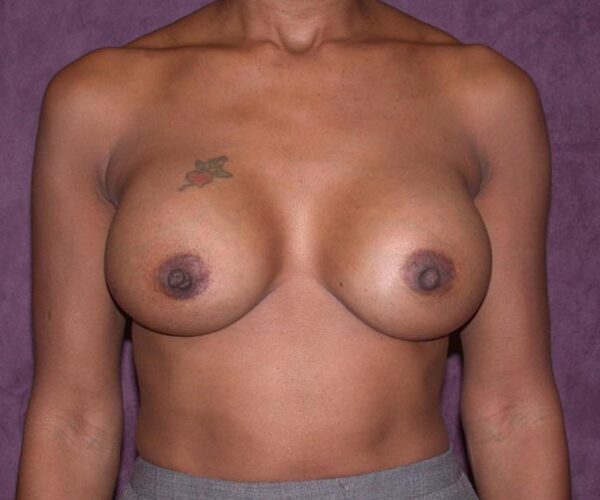
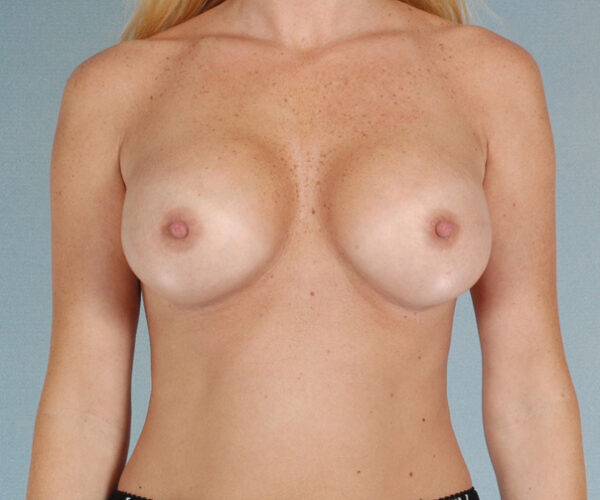
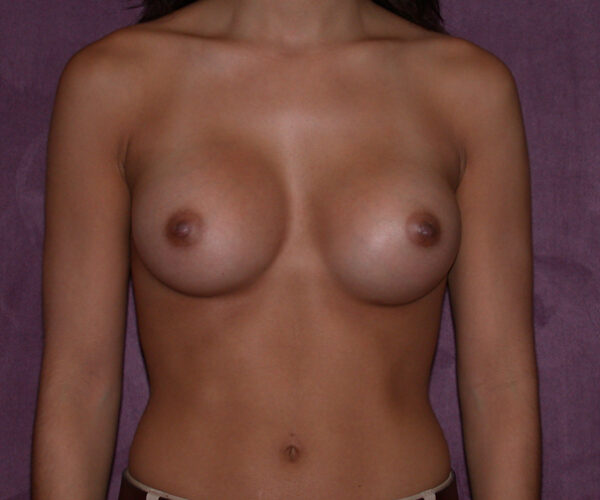
Patient 4
View More Details
Patient 5
View More Details
Patient 6
View More Details
Patient 7
View More Details
Patient 8
View More Details
Patient 9
View More Details
Patient 10
View More Details
Patient 11
View More Details
Patient 12
View More Details
Patient 13
View More Details
Patient 14
View More Details
Patient 15
View More Details
Patient 16
View More Details
Patient 17
View More Details
Patient 18
View More Details
Patient 19
View More Details
Patient 20
View More Details
Patient 21
View More Details
Patient 22
View More Details
Patient 23
View More Details
Patient 24
View More Details
Patient 25
View More Details
Patient 26
View More Details
Patient 27
View More Details
Patient 28
View More Details
Patient 29
View More Details
Patient 30
View More Details
Patient 31
View More Details
Patient 32
View More Details
Patient 33
View More Details
Patient 34
View More Details
Patient 35
View More Details
Patient 36
View More Details
Patient 37
View More Details
Patient 38
View More Details
Patient 39
View More Details
Patient 40
View More Details
Patient 41
View More Details
Patient 42
View More Details
Patient 43
View More Details
Patient 44
View More Details
Patient 45
View More Details
Patient 46
View More Details
Patient 47
View More Details
Patient 48
View More Details
Patient 49
View More Details
Patient 50
View More Details
Patient 51
View More Details
Patient 52
View More Details
Patient 53
View More Details
Patient 54
View More Details
Patient 55
View More Details
Patient 56
View More Details
Patient 57
View More Details
Patient 58
View More Details
Patient 59
View More Details
Patient 60
View More Details
Patient 61
View More Details
Patient 62
View More Details
Patient 63
View More Details
Patient 64
View More Details
Patient 65
View More Details
Patient 66
View More Details
Patient 67
View More Details
Patient 68
View More Details
Patient 69
View More Details
Patient 70
View More Details
Patient 71
View More Details
Patient 72
View More Details
Patient 73
View More Details
Patient 74
View More Details
Patient 75
View More Details
Patient 76
View More Details
Patient 77
View More Details
Patient 78
View More Details
Patient 79
View More Details
Patient 80
View More Details
Patient 81
View More Details
Patient 82
View More Details
Patient 83
View More Details
Please ensure Javascript is enabled for purposes of
website accessibility